 |
How to install barcode: Step-by-Step Guide.
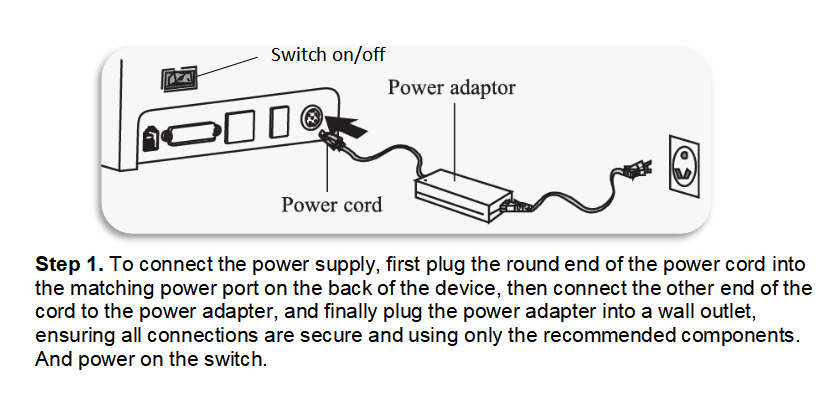
STEP 1: To connect the power supply, first plug the round end of the power cord into the matching power port on the back of the device, then connect the other end of the cord to the power adapter, and finally plug the power adapter into a wall outlet, ensuring all connections are secure and using only the recommended components. And power on the switch.
 |
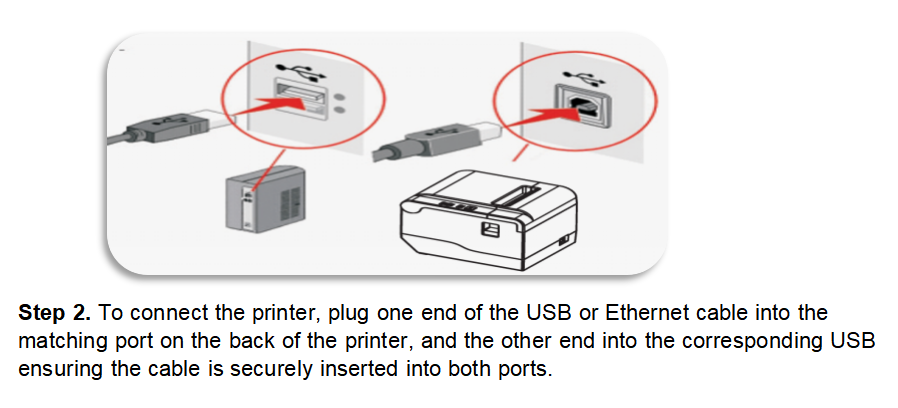
STEP 2: To connect the printer, plug one end of the USB or Ethernet cable into the matching port on the back of the printer, and the other end into the corresponding USB ensuring the cable is securely inserted into both ports.
 |
USB Port Driver Installation.
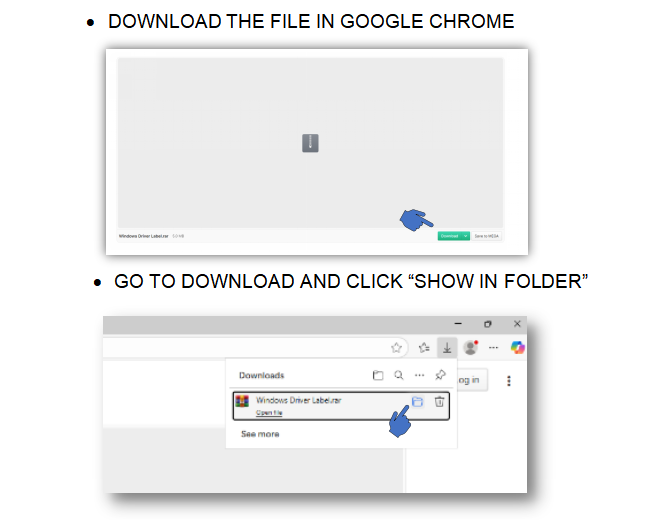
STEP 1:
- DOWNLOAD THE FILE IN GOOGLE CHROME
- GO TO DOWNLOAD AND CLICK “SHOW IN FOLDER”
 |
STEP 2:
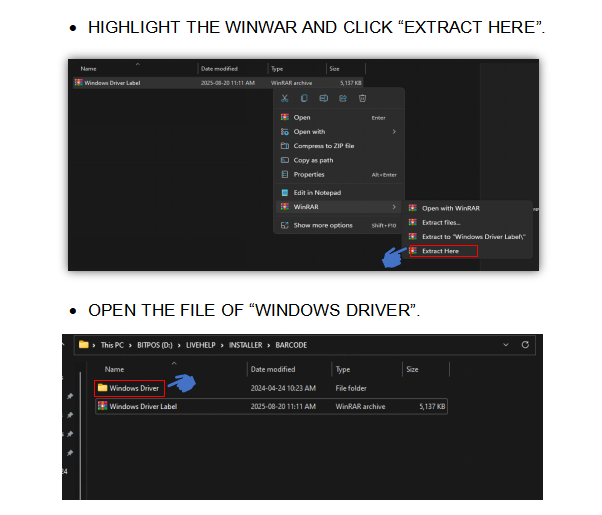
- HIGHLIGHT THE WINWAR AND CLICK “EXTRACT HERE”.
- OPEN THE FILE OF “WINDOWS DRIVER”.
 |
STEP 3:
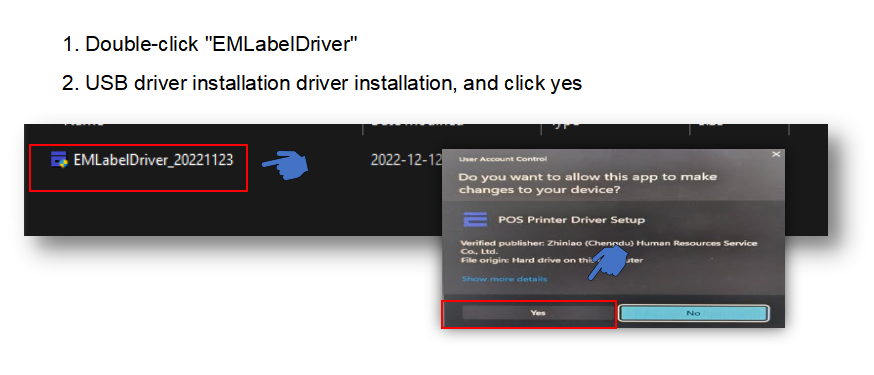
- DOUBLE-CLICK EMLabelDriver
- CLICK Yes
 |
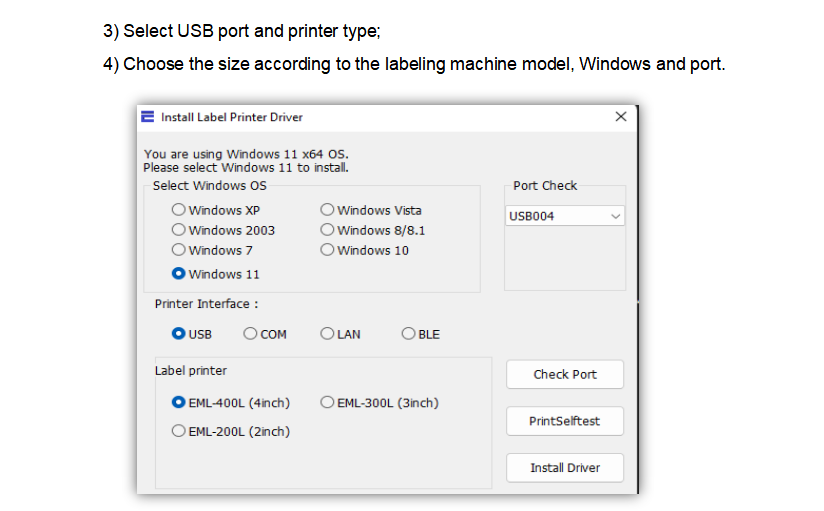
- SELECT USB PORT AND PRINTER TYPE
- CHOOSE THE SIZE ACCORDING THE LABELLING MACHINE MODEL, WINDOWS AND PORT
 |
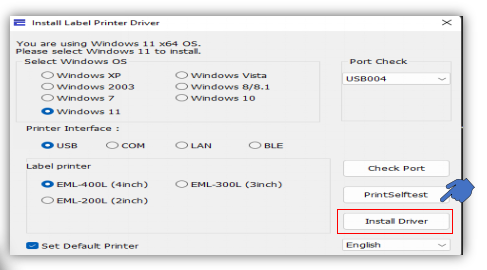
- CLICK Install Driver
 |
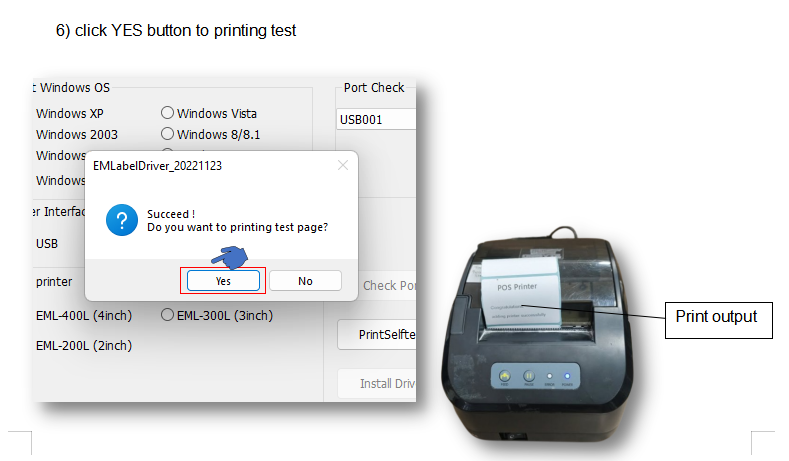
- CLICK YES BUTTON TO PRINT TEST
 |
How to Print the Barcode: Step By Step Guide
SYSTEM GENERATED:
STEP 1: Search in google chrome localhost/acct
 |
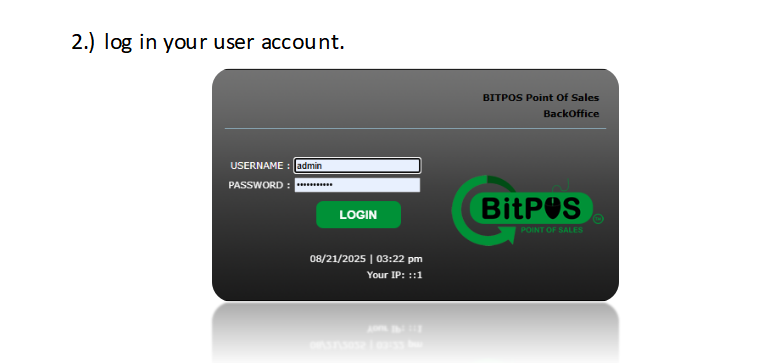
STEP 2: Log in your user account.
 |
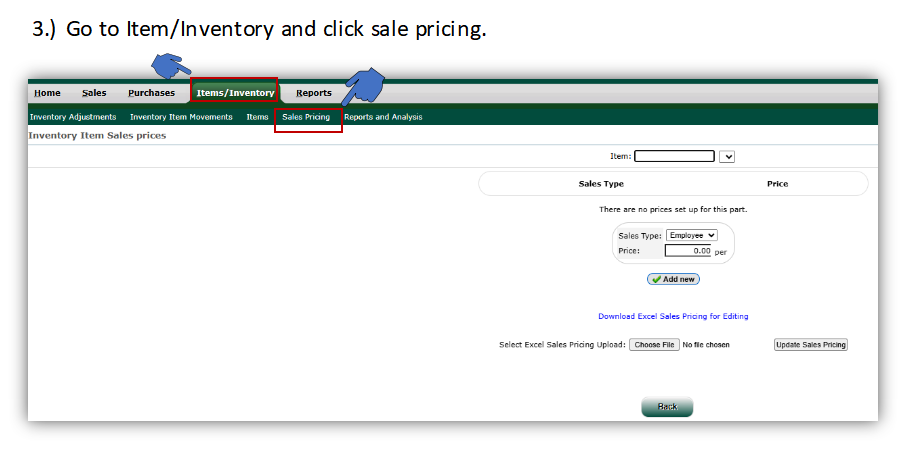
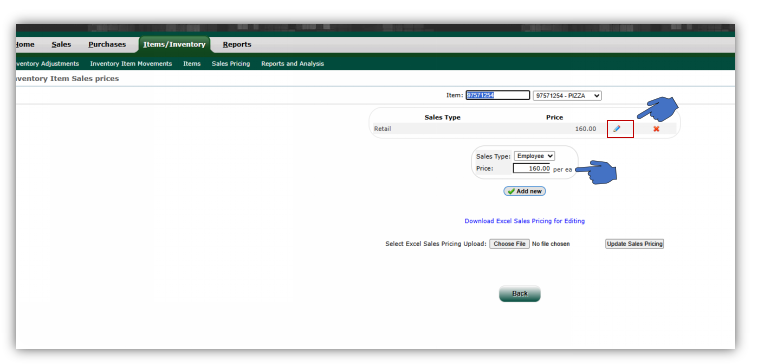
STEP 3: Go to Item/Inventory and click Sales Pricing
 |
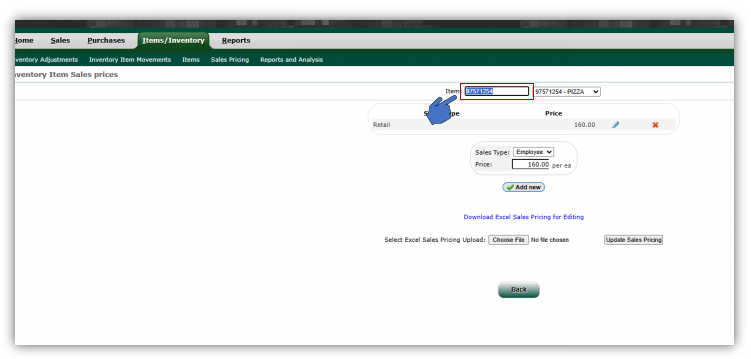
STEP 4: Click the item type the item name or you can also type (*) asterisk alone to show all item in category and ENTER
 |
STEP 5: Click edit or pencil icon.
- We can also input a price if none is provided. and click update
 |
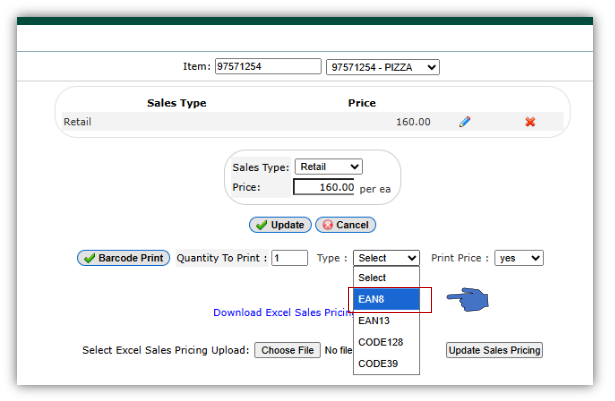
STEP 6: Set the type what printer is installed in our device
 |
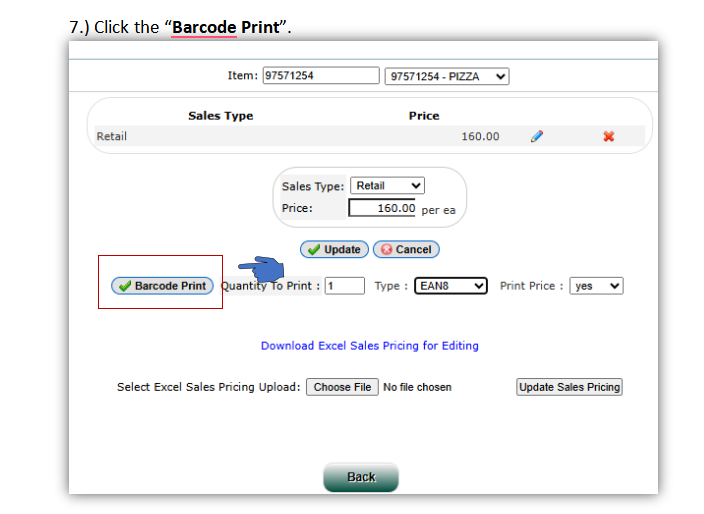
STEP 7:Click the Barcode Print
 |
 |
EM LEBEL APPLICATION
APPLICATION FOR TESTING OUR MINI PRINTER.
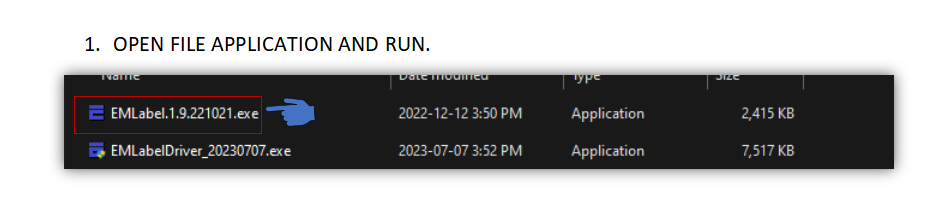
1. OPEN FILE APPLICATION AND RUN.
 |
2. OPEN THE APPLICATION IN DESKTOP.
 |
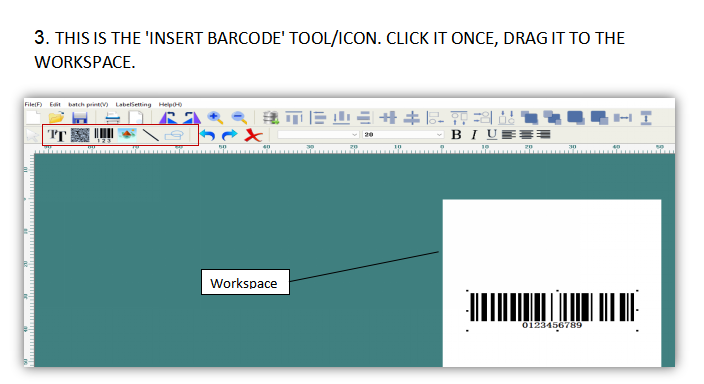
3.THIS IS THE 'INSERT BARCODE' TOOL/ICON. CLICK IT ONCE, DRAG IT TO THE WORKSPACE.
 |
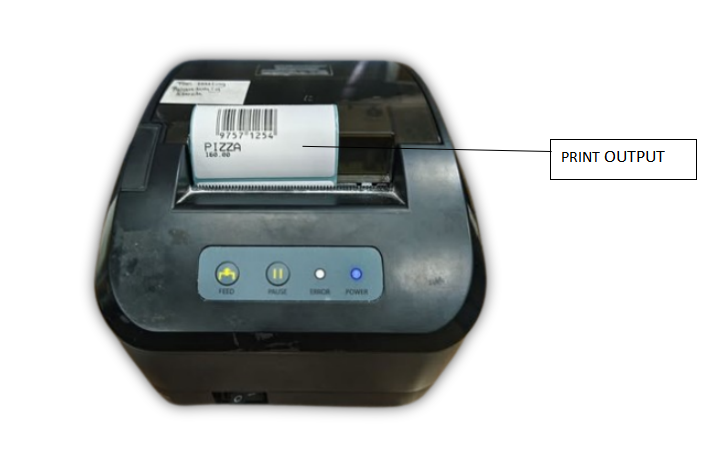
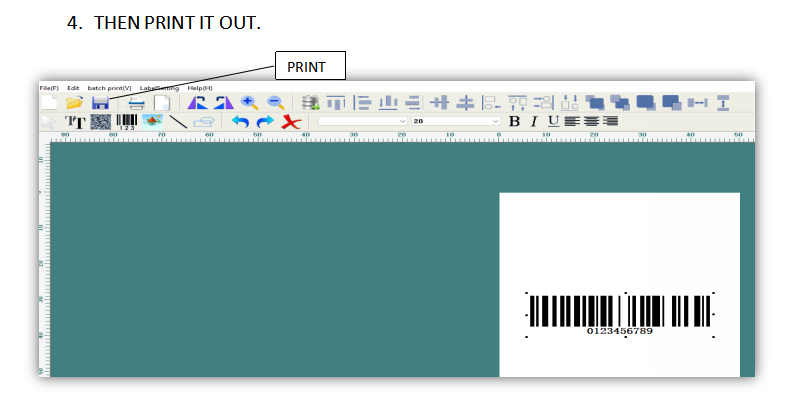
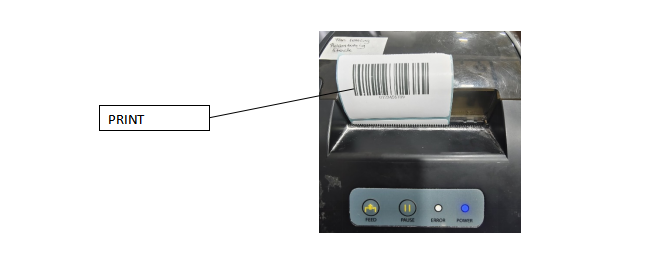
4.THEN PRINT IT OUT.
 |
 |