Main /
MOT Salon Adding of Services
Adding of services is the process of recording and confirming a customer’s selected services in the MOT App, which includes choosing the service category, adding items, and linking them to the customer’s table for proper management of transactions.
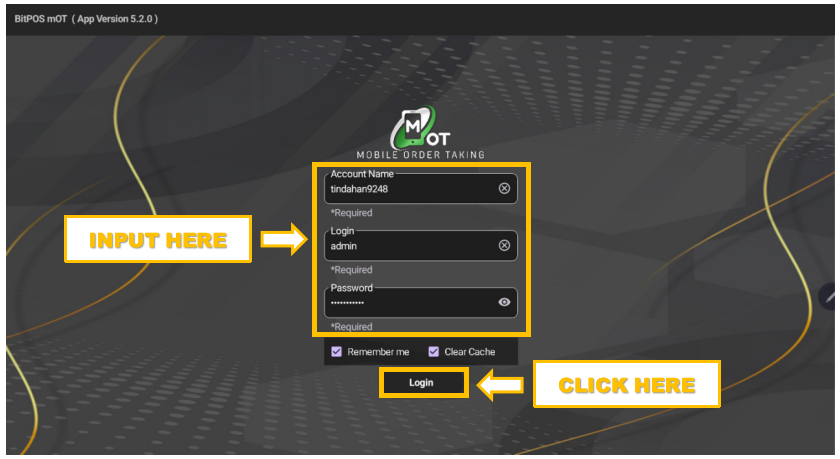
- STEP 1: Open MOT App
- Launch the application on your device to begin.
 |
- STEP 2: Log in using Admin credentials
- Enter your admin login to access the service management features.
 |
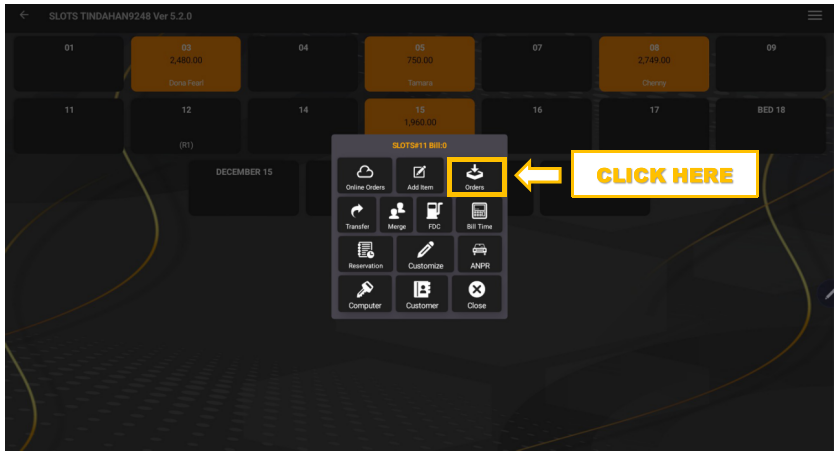
- STEP 3: Click Available Slots
- Select a free slot or table for the customer.
 |
- STEP 4: Click Orders
- Open the order menu to add services.
 |
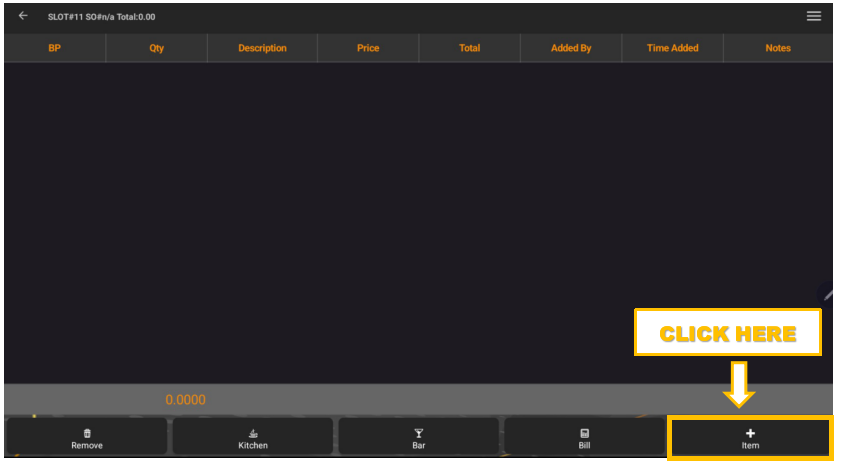
- STEP 5: Click + Item
- Choose to add a new service.
 |
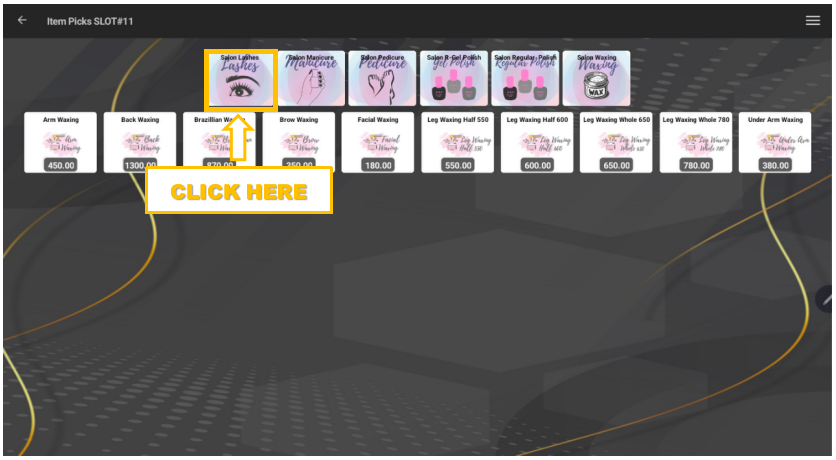
- STEP 6: Choose the category of the service
- Pick the correct category for easier identification.
 |
- STEP 7: Choose the service for the customer
- Select the exact service or item requested.
 |
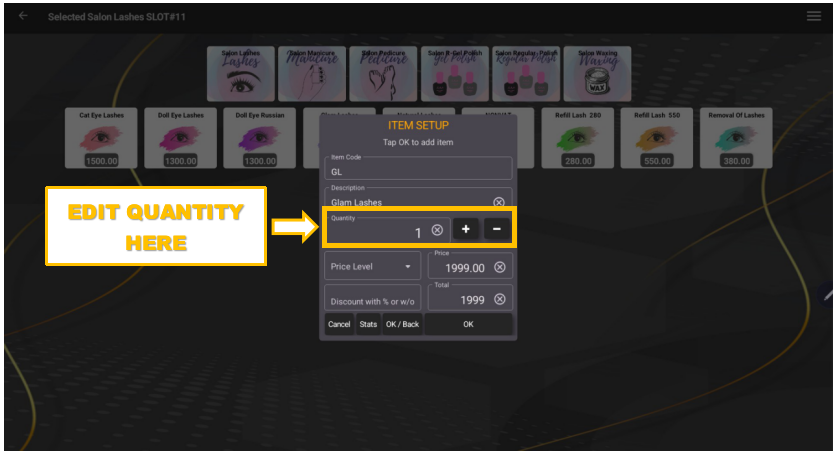
- STEP 8: Edit the quantity
- Adjust if the customer is availing more than one.
 |
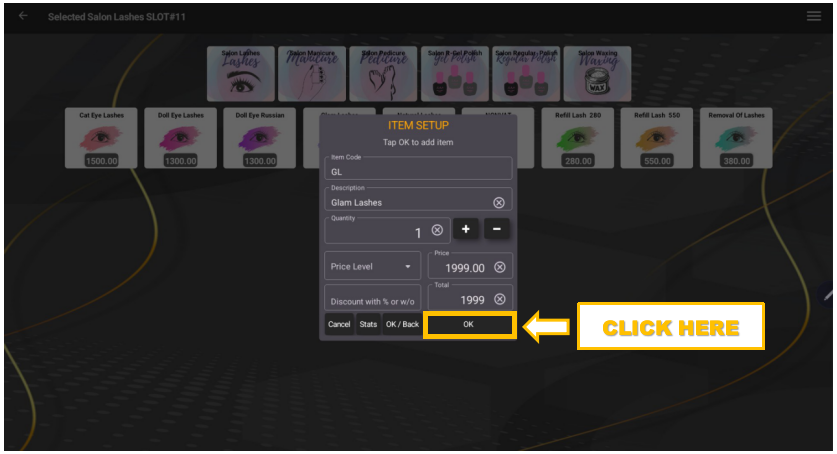
- STEP 9: Click OK
- Save the chosen service.
 |
- STEP 10: Add another service (optional)
- Repeat the process if needed.
 |
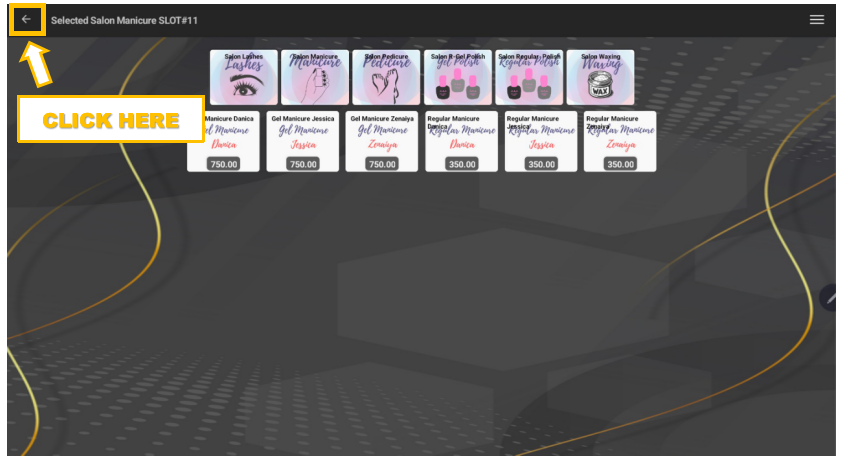
- STEP 11: Click the Back button
- Return to the previous screen.
 |
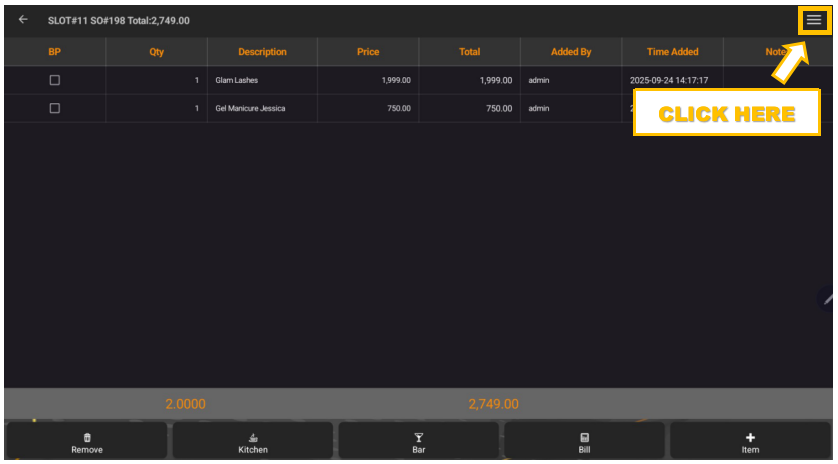
- STEP 12: Click the Hamburger button (3 lines)
- Open the menu for more options.
 |
- STEP 13: Click Customer Name/ID
- Prepare to link the service to the customer.
 |
- STEP 14: Input the customer’s name
- Enter the correct name for identification.
 |
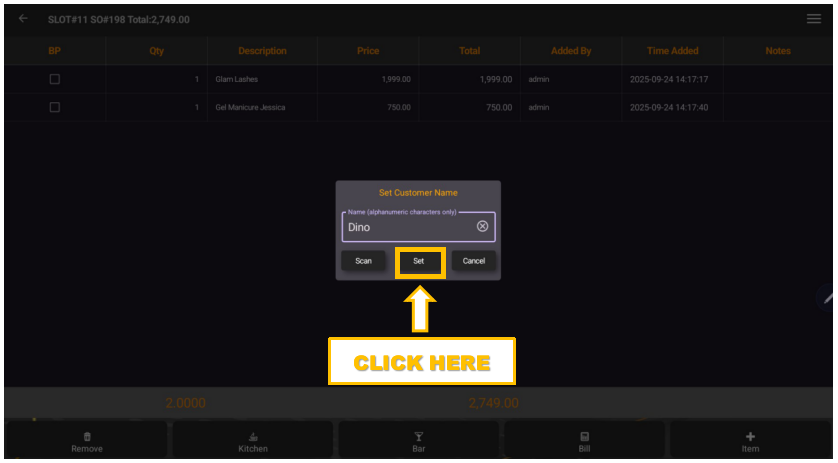
- STEP 15: Click Set
- Confirm the customer’s name entry.
 |
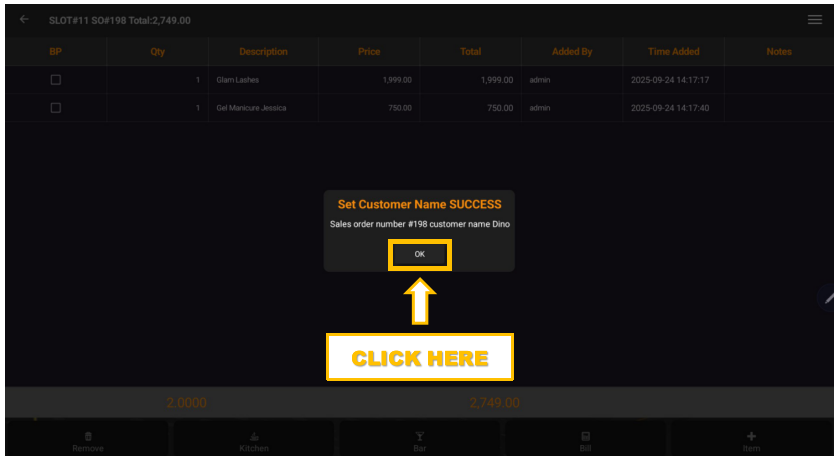
- STEP 16: Click OK
- Save the settings made.
 |
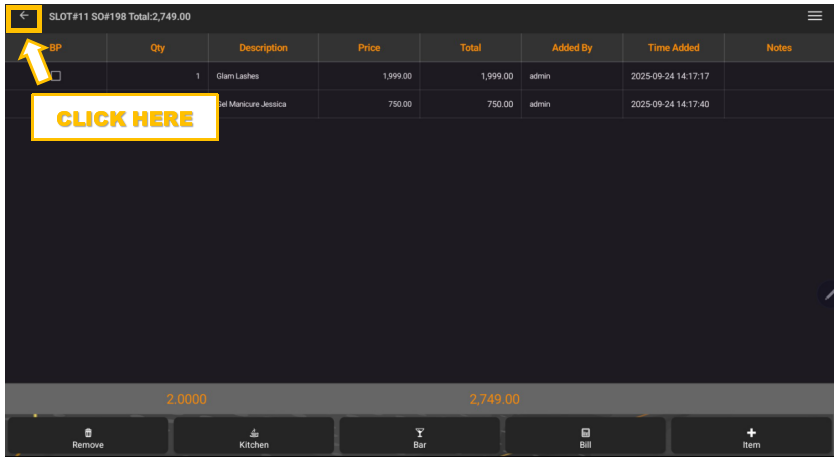
- STEP 17: Click the Back button
- Go back to the table view.
 |
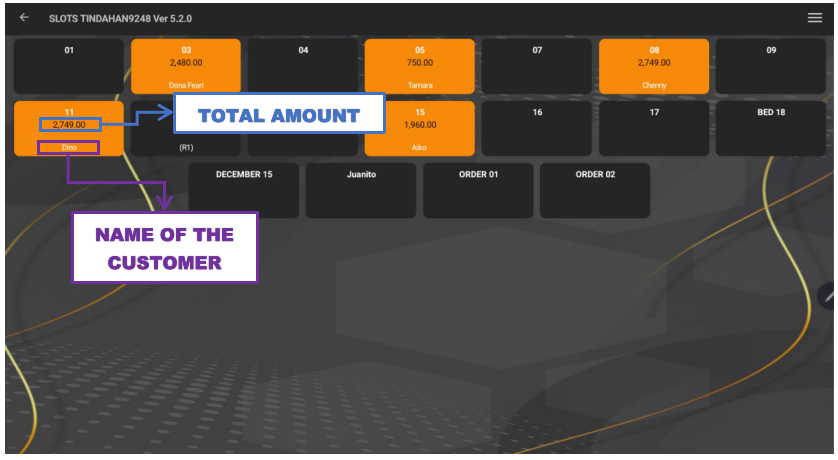
- STEP 18: The table will change color and show the customer’s name with the total amount
- This confirms the services have been successfully added.
 |