INVENTORY LOCATION TRANSFERS
Inventory Location Transfers which means is just moving items from one place to another within your business using the computer system you use to manage sales and stock. To facilitate the efficient movement and management of inventory between different locations within a business. This process serves several critical functions, such as optimizing inventory levels by ensuring each location has the appropriate stock to meet customer demand, thus avoiding overstocking at one location and stockouts at another.
- STEP 1: Accessing Back Office:
- You go into the Back Office and login.
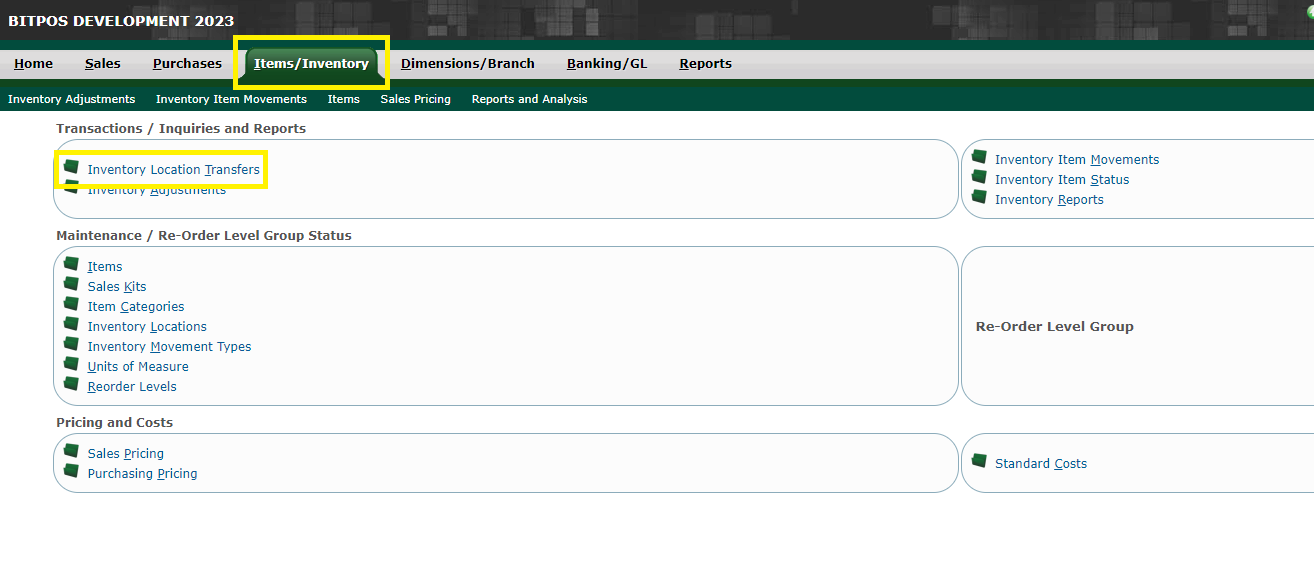
- STEP 2: Go to Items/Inventory
- Click Inventory Location Transfers.
 |
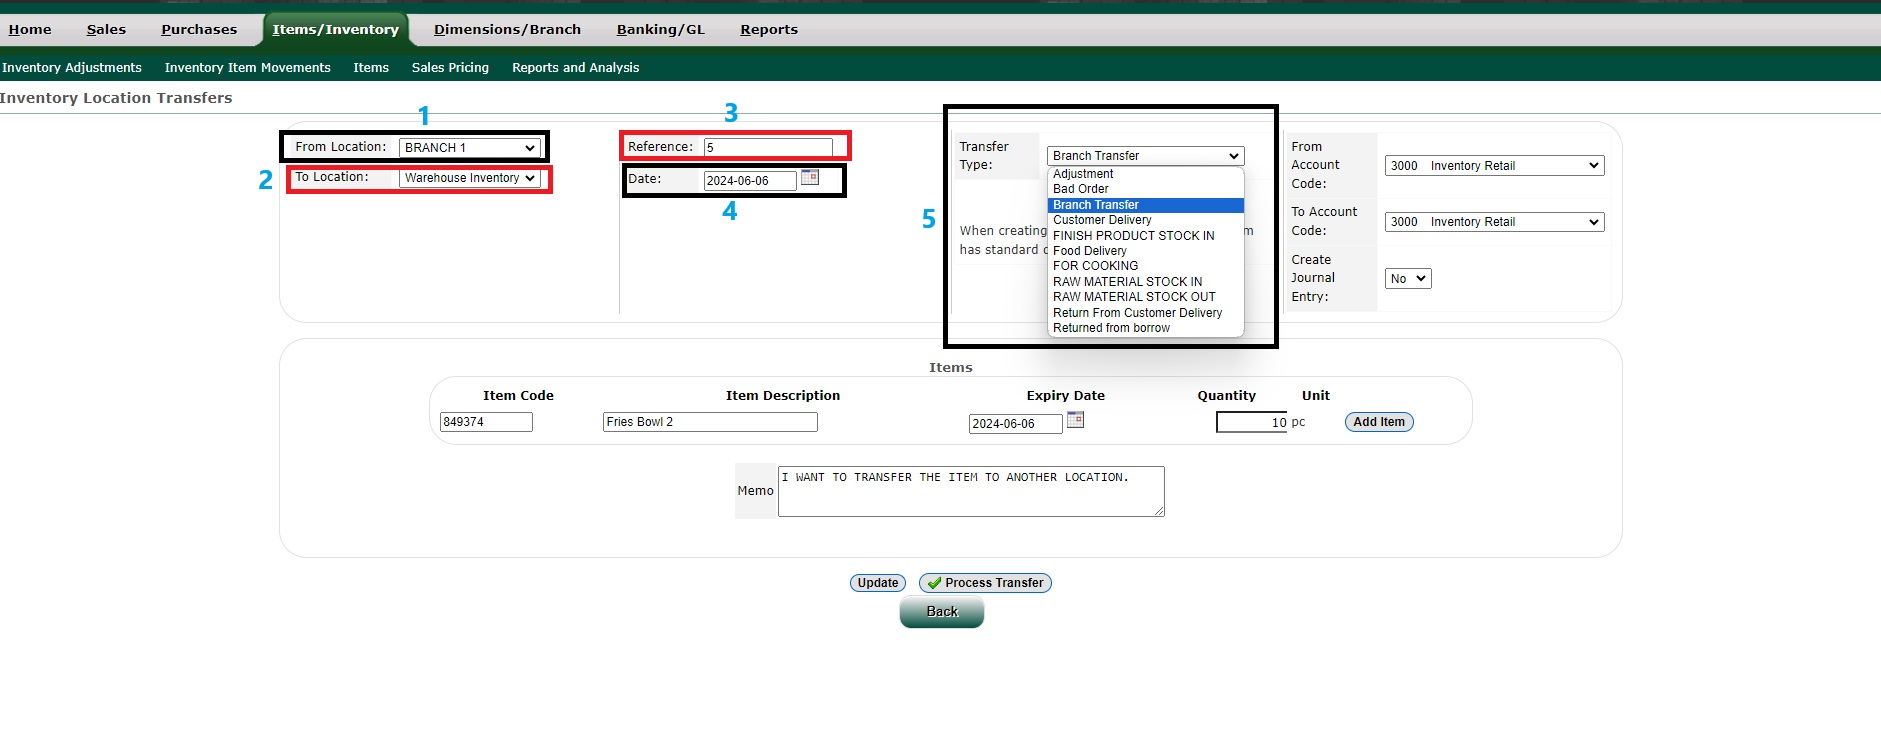
- STEP 3: Select Transfer Option:
- Select the From Location which means the origin point of the inventory transfer.
- Select the To Location which means the destination of the inventory transfer.
- Reference which means a unique reference number assigned to this transfer for tracking and auditing purposes.
- Select the Date when the transfer is recorded or initiated. This helps in scheduling and record-keeping.
- Select the Transfer Type which means indicates that this is a routine transfer between internal locations, such as between warehouses and stores.
- From Account Code which means the account code corresponding from location inventory. This code is used for financial tracking.
- To Account Code which means the account code for to location inventory, ensuring that the financial implications of the transfer are correctly recorded.
- Create Journal Entry which means the selecting this option will create a journal entry in the accounting system to reflect the inventory movement, ensuring accurate financial records. If it YES or NO.
 |
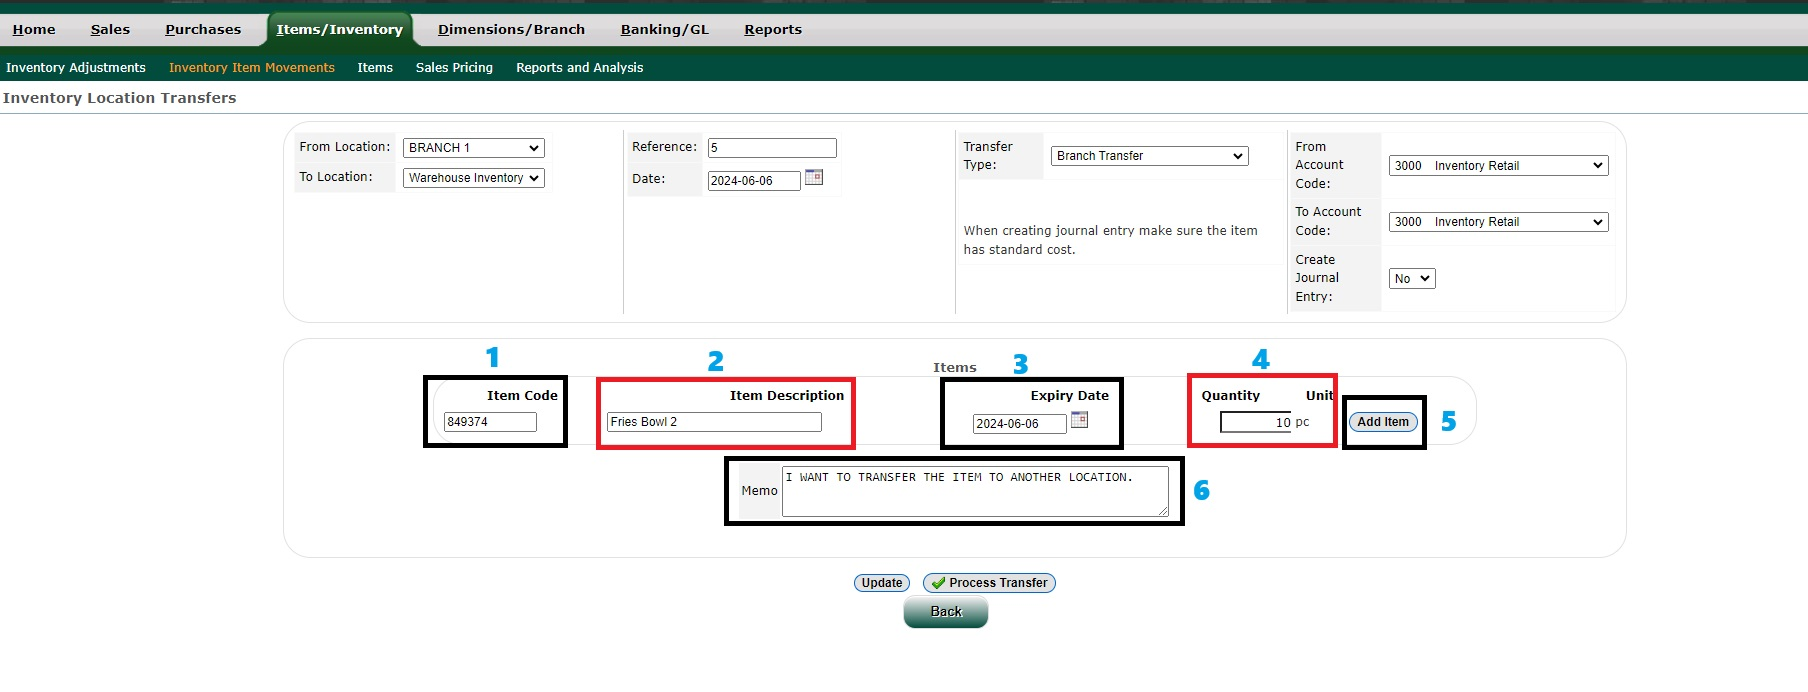
STEP 4: Choose Items: Type the Item Code for each product or you can type directly the item name for example Fries.
- Item Description which means the full description on the product.
- Expiry Date which means for perishables, when they expire.
- Type the Quantity which means how many of the product are being moved.
- Click the Add New.
- Type the Memo optional notes about the transfer.
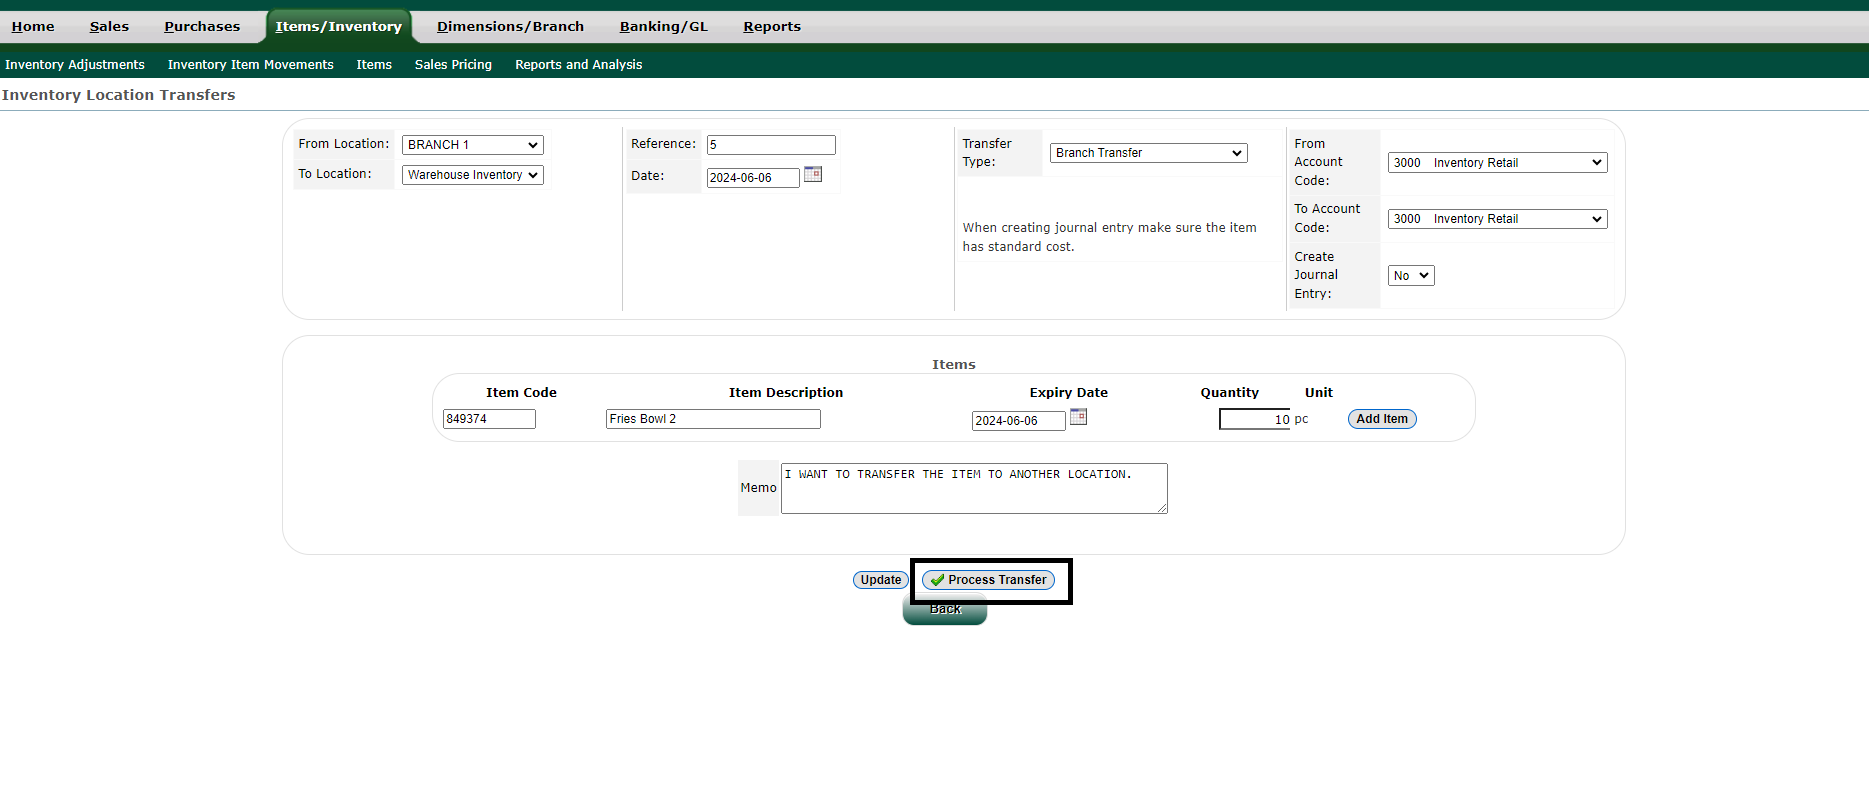
- STEP 5: Confirm:
- Click the Process Transfer once all locations have been filled up for the transfers.
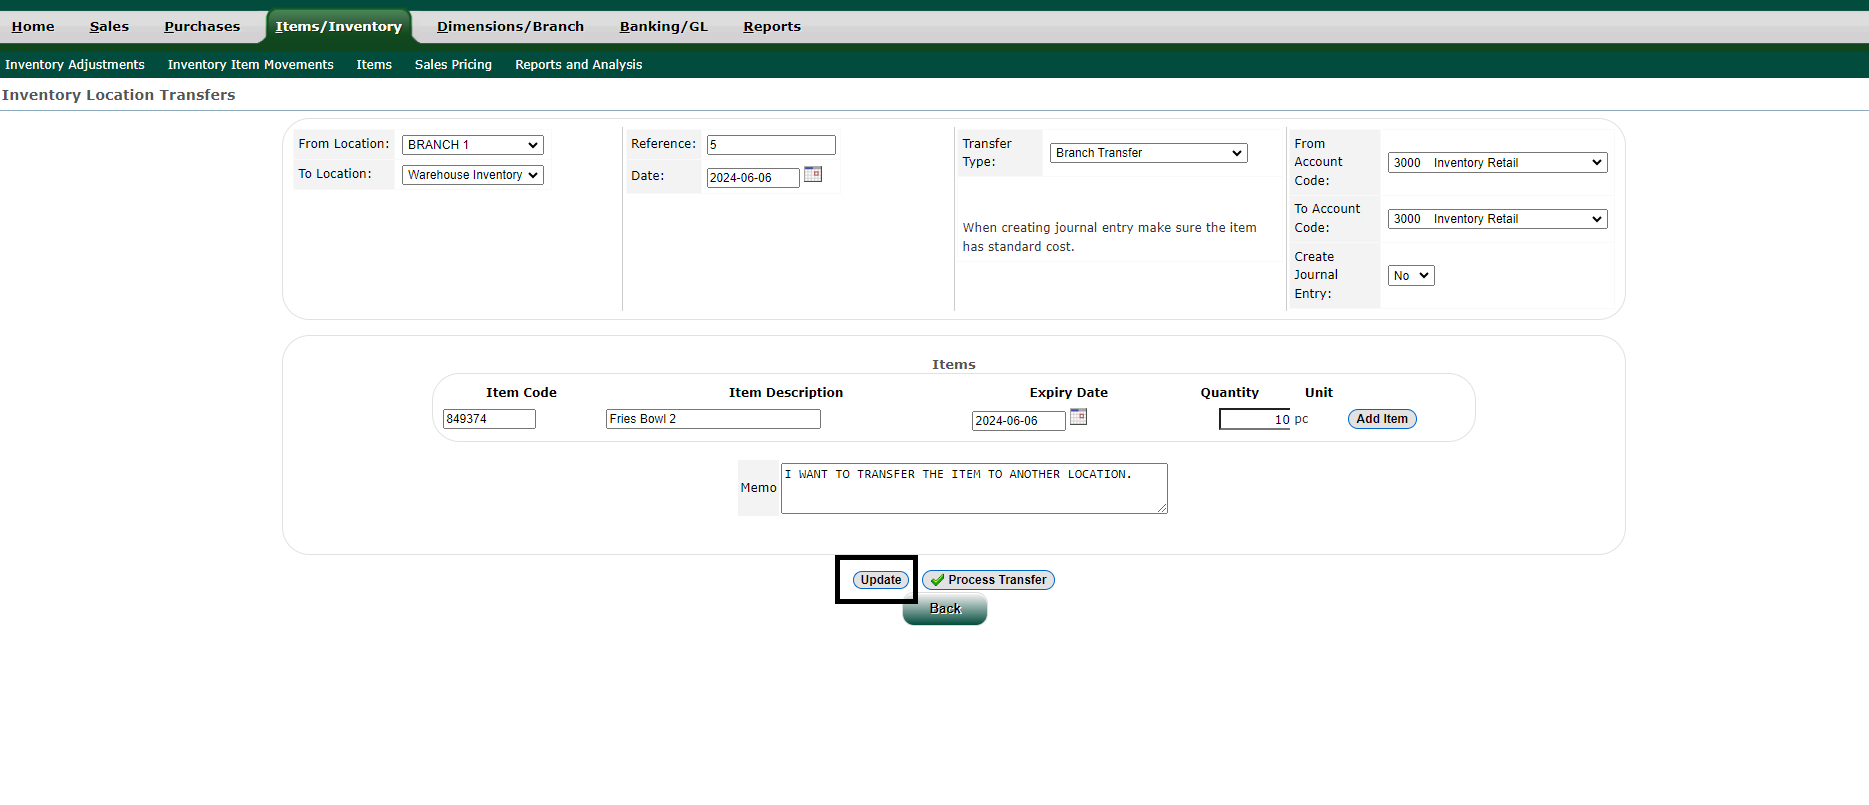
- STEP 6: In case there are changes or if the item needs updating, click on Update.