Main /
MCI Facial Registration
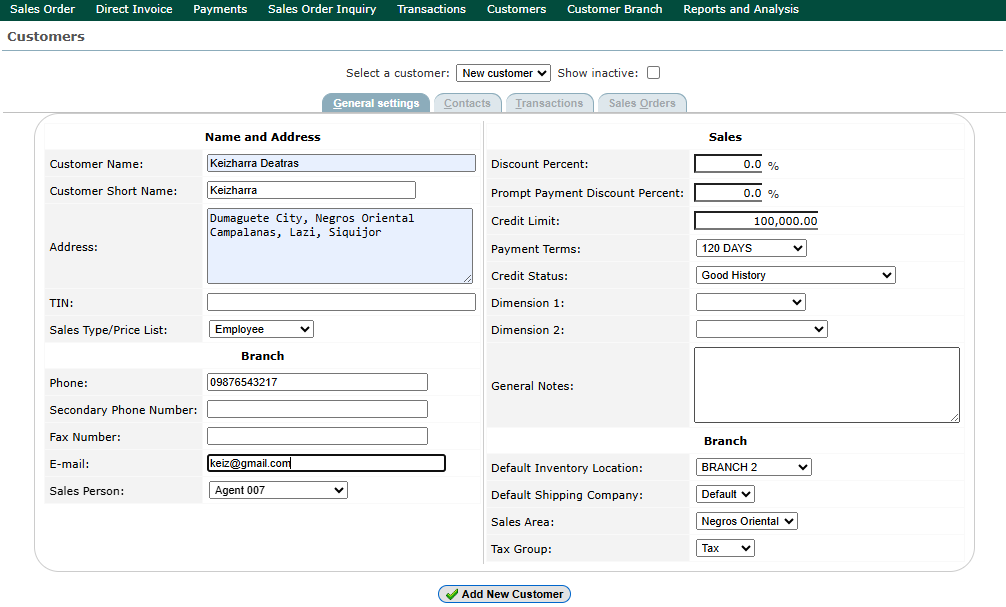
STEP 1: Create Client on the Back Office. Make sure the client is already created in the Back Office before starting the facial registration process.
 |
| STEP 2: Open MCI App. Launch the MCI application on your device. |  |
| STEP 3: Log In. Enter your admin credentials to access the system. | 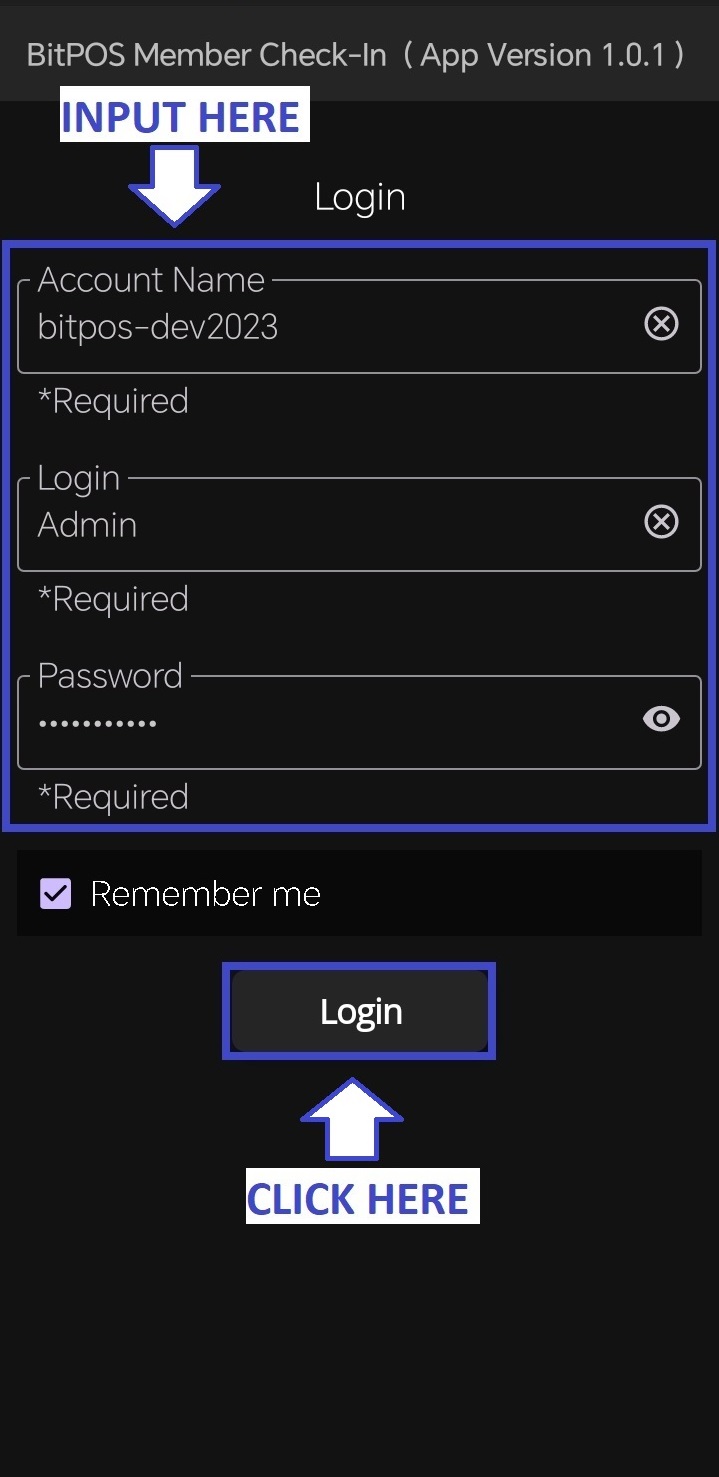 |
| STEP 4: Click the Three-Dot Icon. Tap the three-dot menu located at the upper part of the screen. | 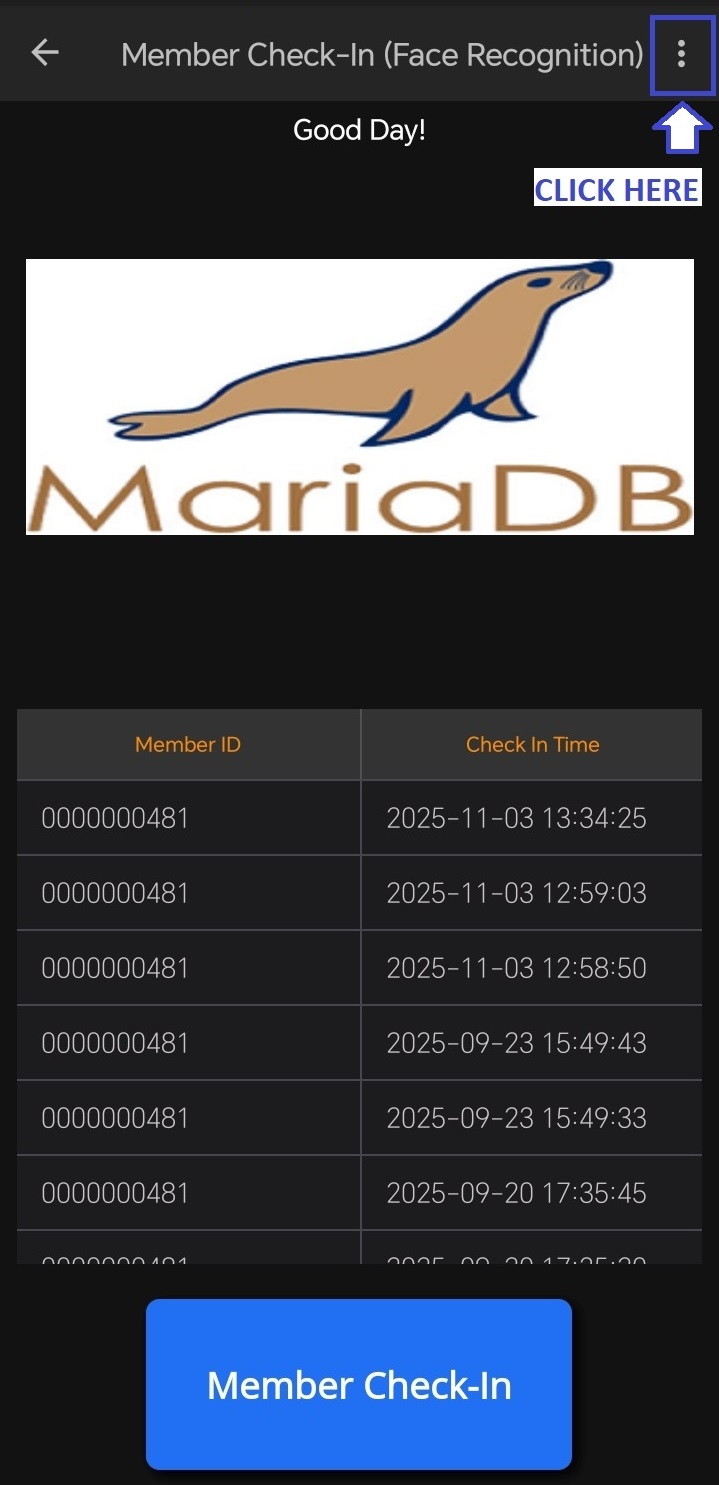 |
| STEP 5: Click Register Member. Select “Register Member” to begin the facial registration process. |  |
| STEP 6: Search Client. Type the client’s name in the search bar and select the correct profile. | 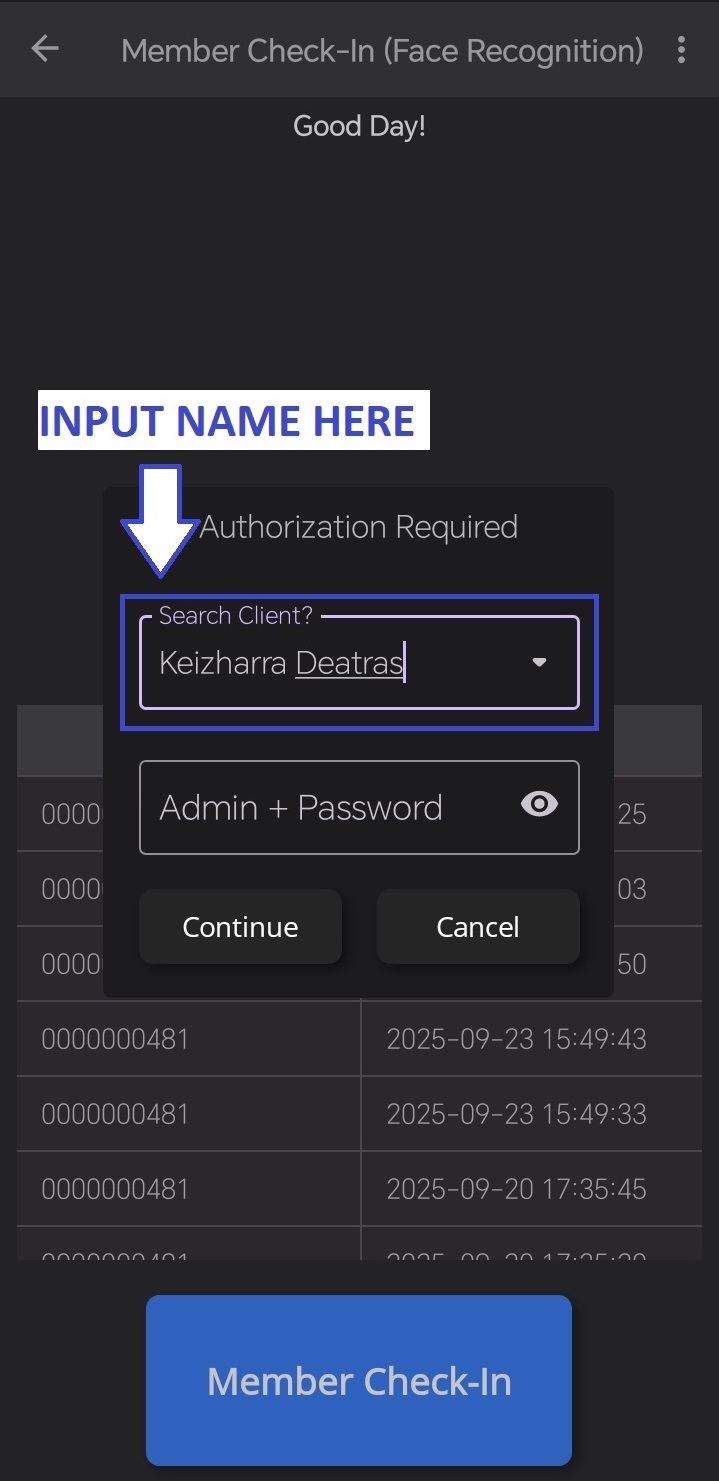 |
| STEP 7: Input Admin + Password. Enter your admin username and password for verification. | 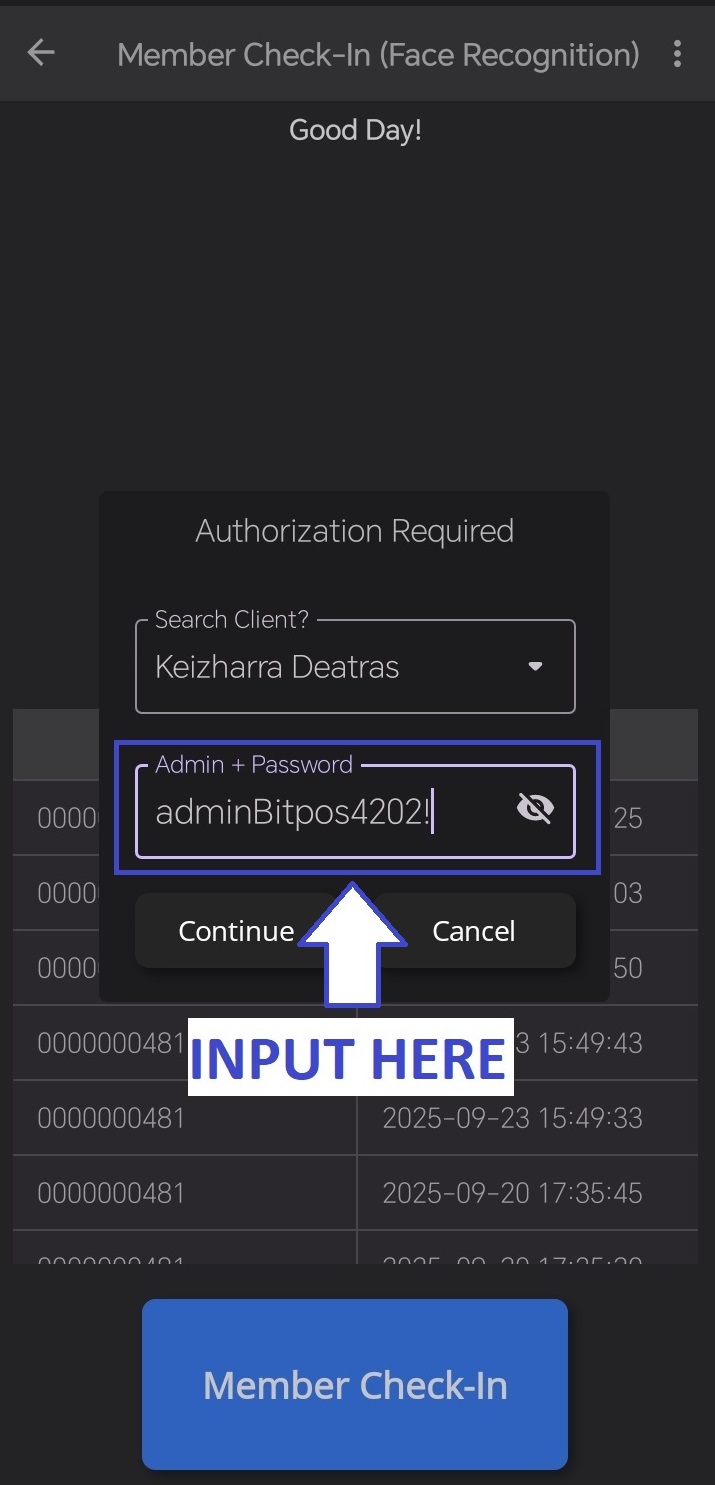 |
| STEP 8: Click Continue. Proceed to the facial scanning page. | 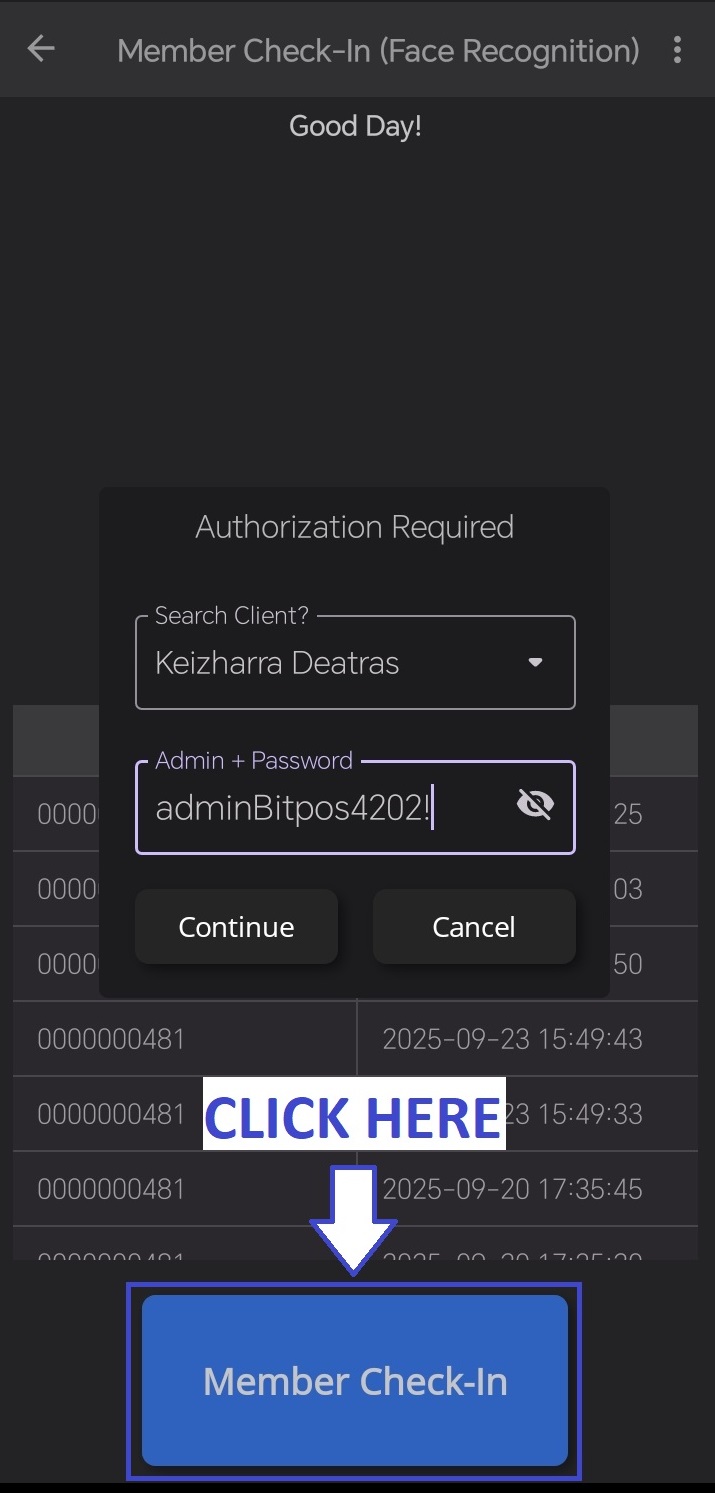 |
| STEP 9: Register Face, Confirm Registration, and Finish. Follow the on-screen instructions to capture the client’s face, then click Confirm Registration and finally tap OK to complete and save the facial registration. | 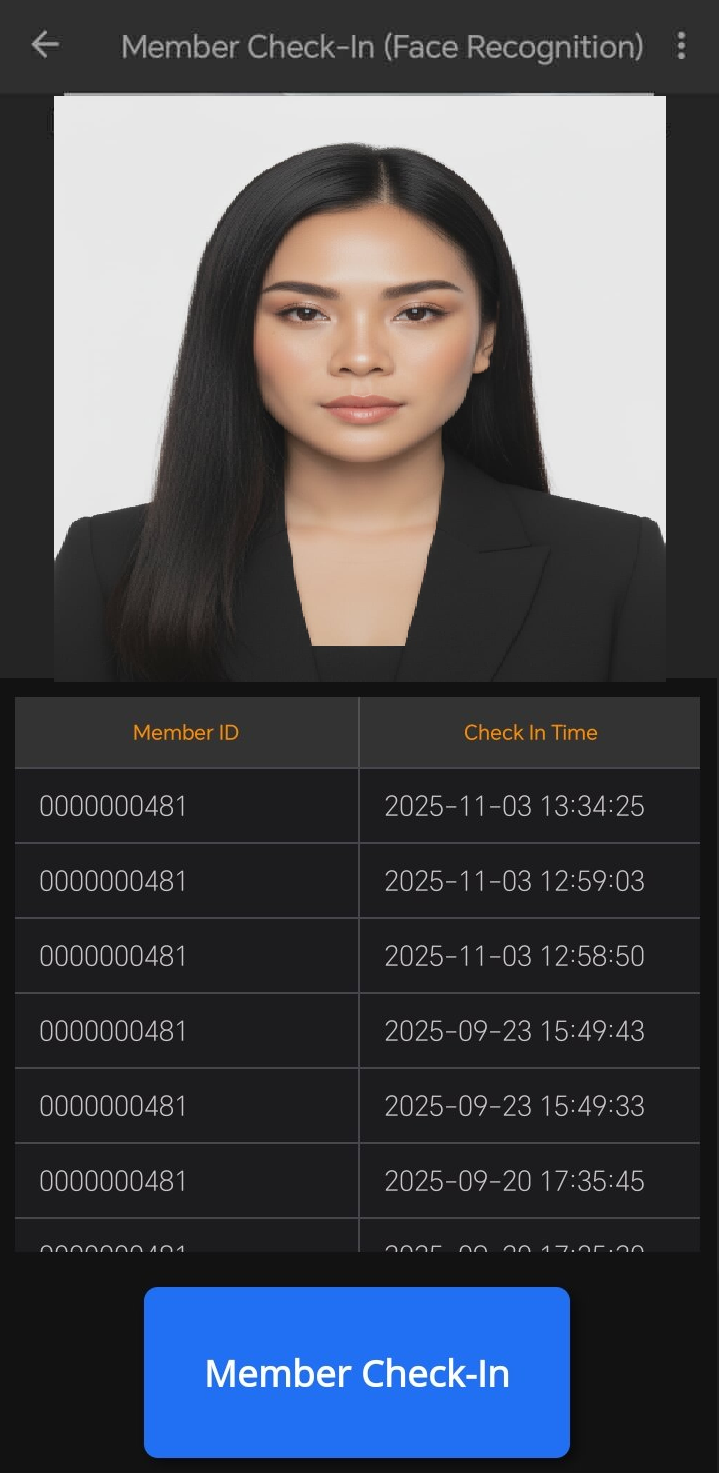 |