Main /
How to Create a Purchase Order
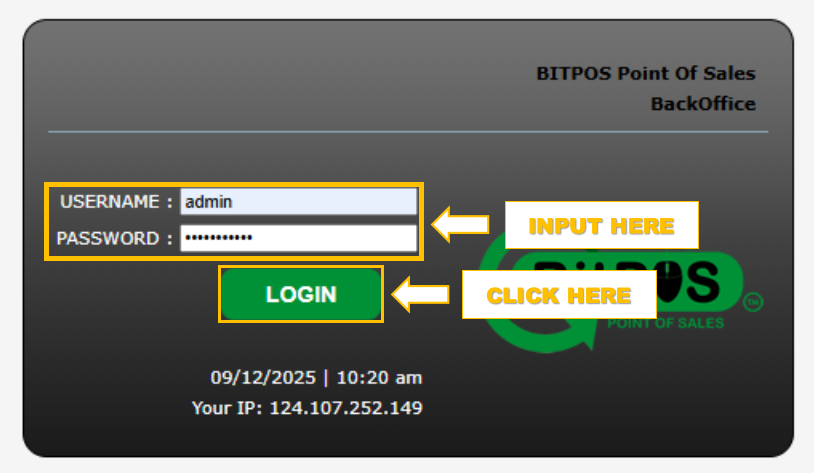
- STEP 1: Log in to the Branch Back Office
- Start by signing in to the back-office system of your branch using your account.
 |
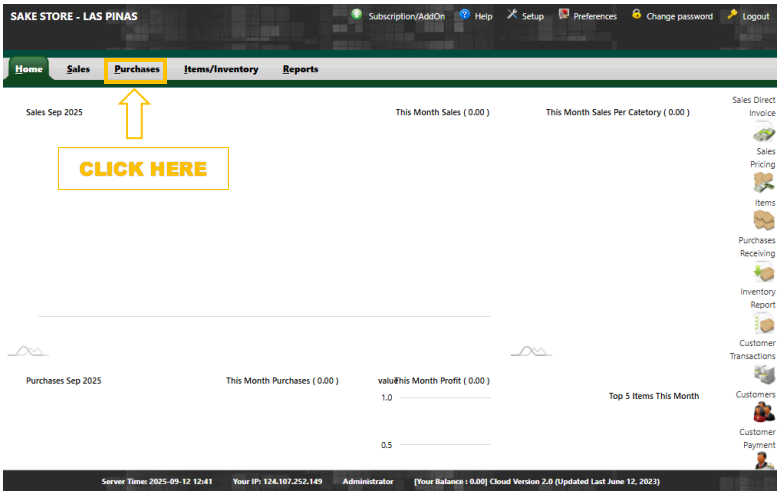
- STEP 2: Go to Purchases
- Once you are logged in, look for the Purchases section in the menu.
 |
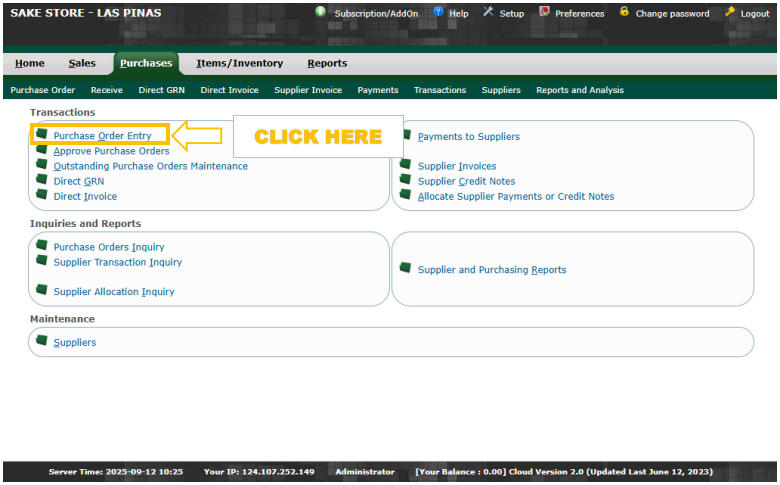
- STEP 3: Open Purchase Order Entry
- Inside the Purchases menu, click on Purchase Order Entry.
 |
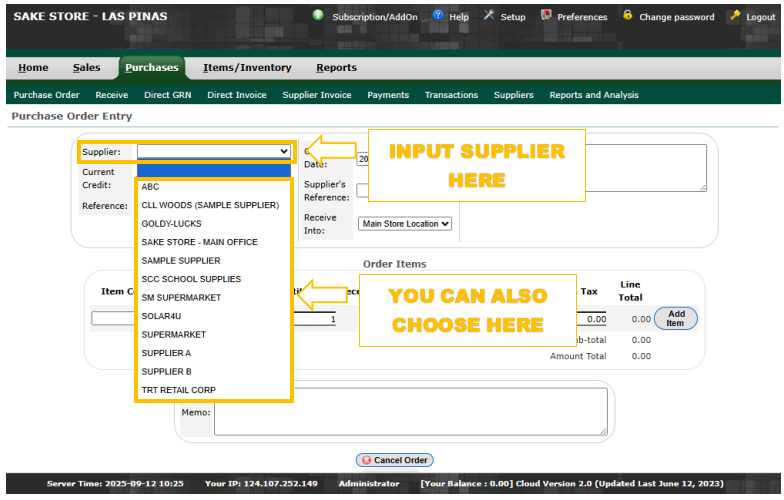
- STEP 4: Select Your Supplier
- Choose the supplier you are ordering from. For example, if you are buying from the Sake Main Store, select it from the supplier list.
 |
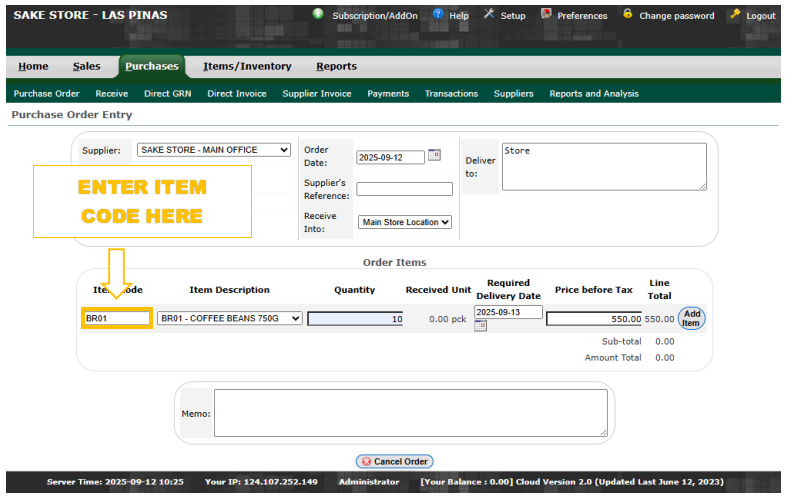
- STEP 5: Enter the Item Code
- Type the code of the item you want to order. For example, enter BR01 if that is the product code of the item.
 |
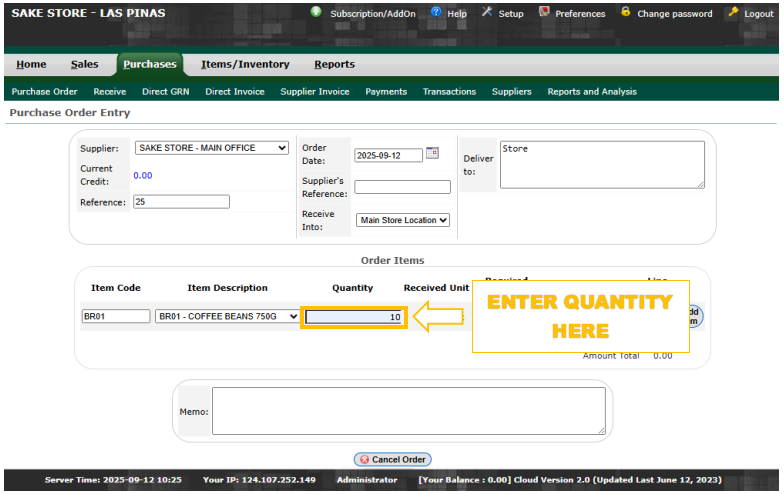
- STEP 6: Enter the Quantity
- After typing the item code, enter how many pieces or packs you want to order. For example, type 10 packs.
 |
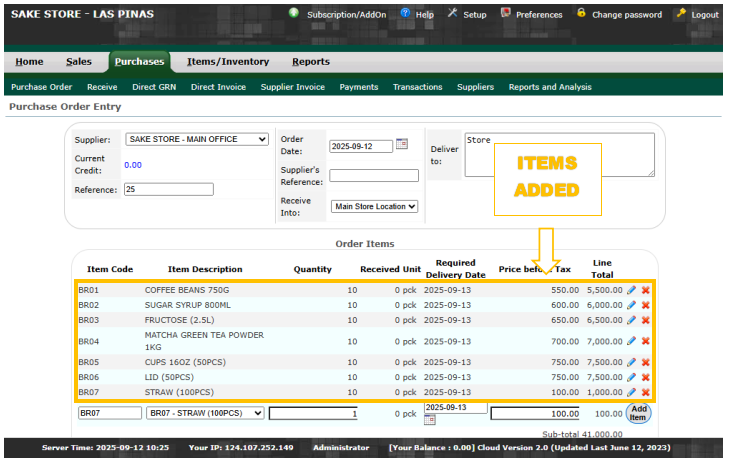
- STEP 7: Add the Item to the Order
- Click Add Item so that the item and its quantity will appear in your order list.
 |
- STEP 8: Add More Items if Needed
- If you want to order more products, repeat the process: type the next item code (like BR02, BR03, BR04, and so on) and enter the quantity. Then click Add Item again. Do this until you have added everything you need.
 |
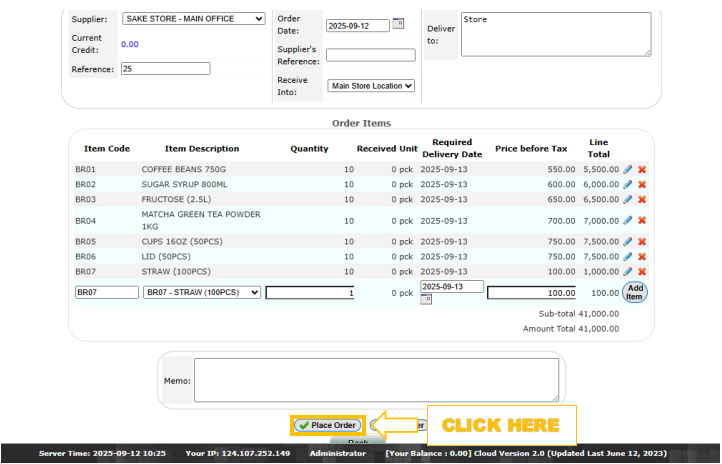
- STEP 9: Place the Order
- Once you have reviewed and confirmed that all items are correct, click Place Order. This will officially send your purchase order to the supplier.
 |
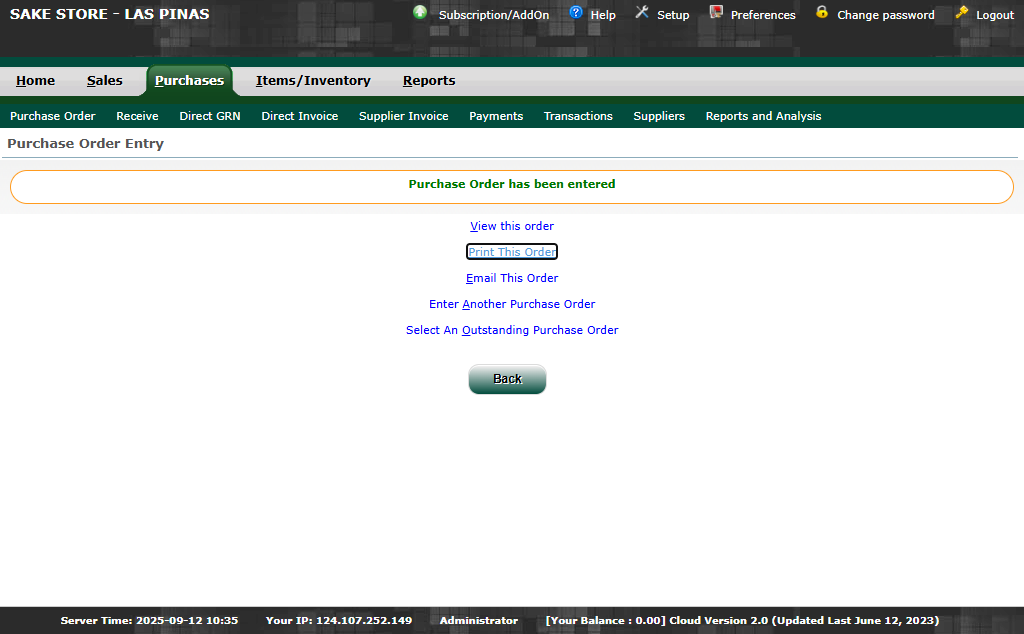
- Step 10: Purchase Order Entered
- The system will now confirm that the purchase order has been successfully entered, and it is ready for approval
 |