Main /
Inventory Location Transfer (Main Office to Truck/Person)
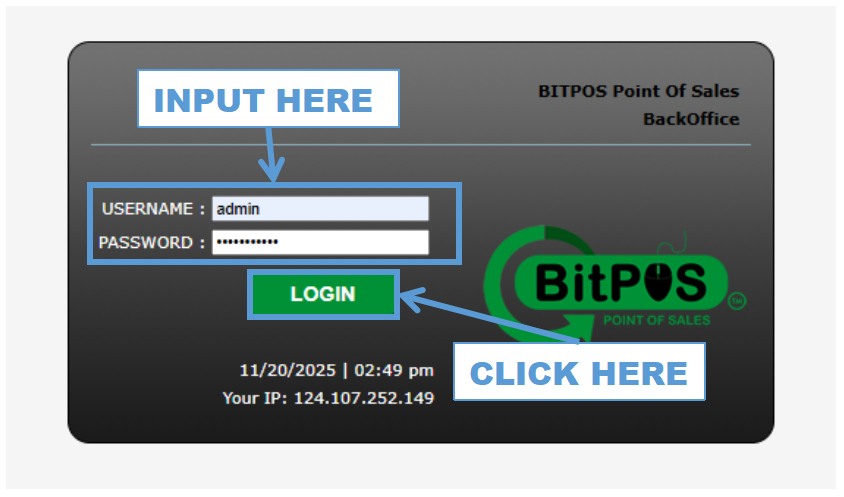
- STEP 1: Log in to the Back Office
- Access the Back Office using your admin credentials.
 |
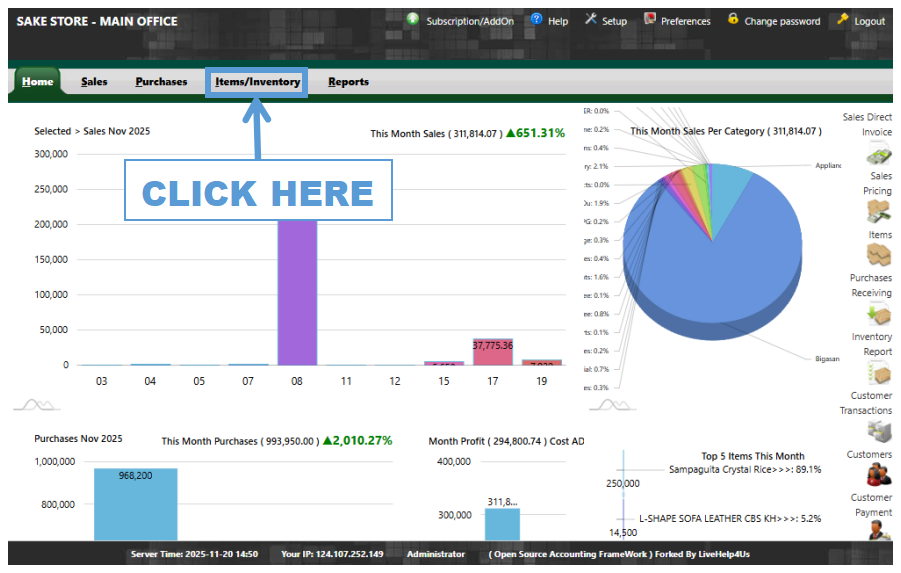
- STEP 2: Click Items/Inventory
- From the main menu, select Items/Inventory to open inventory functions.
 |
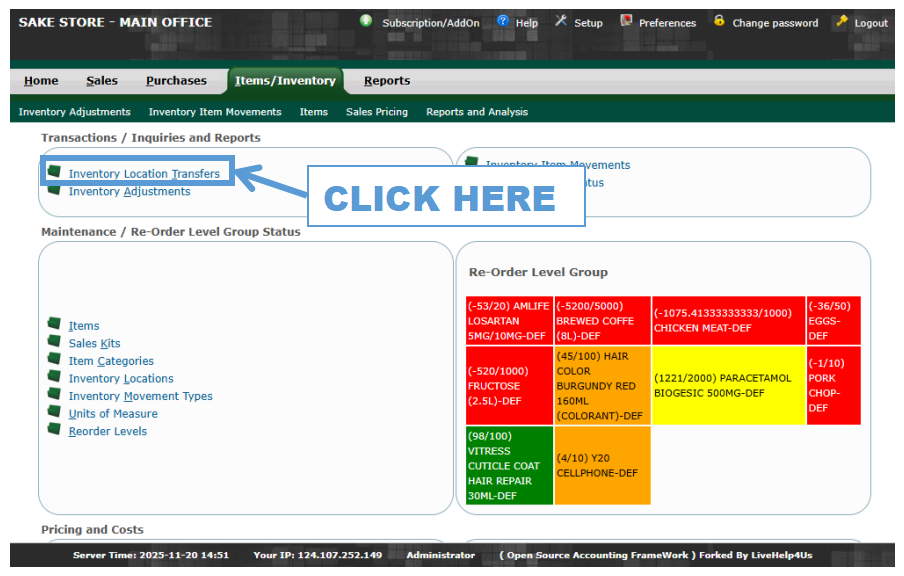
- STEP 3: Click Inventory Location Transfers
- Go to Inventory Location Transfers to process a stock transfer.
 |
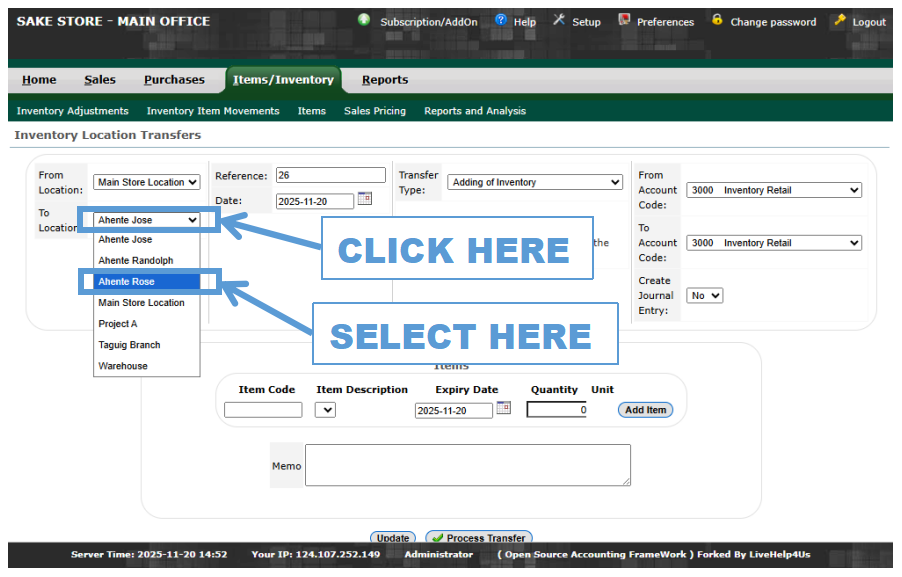
- STEP 4: Select From Location
- Choose the location where the items are being taken from (e.g., Main Office).
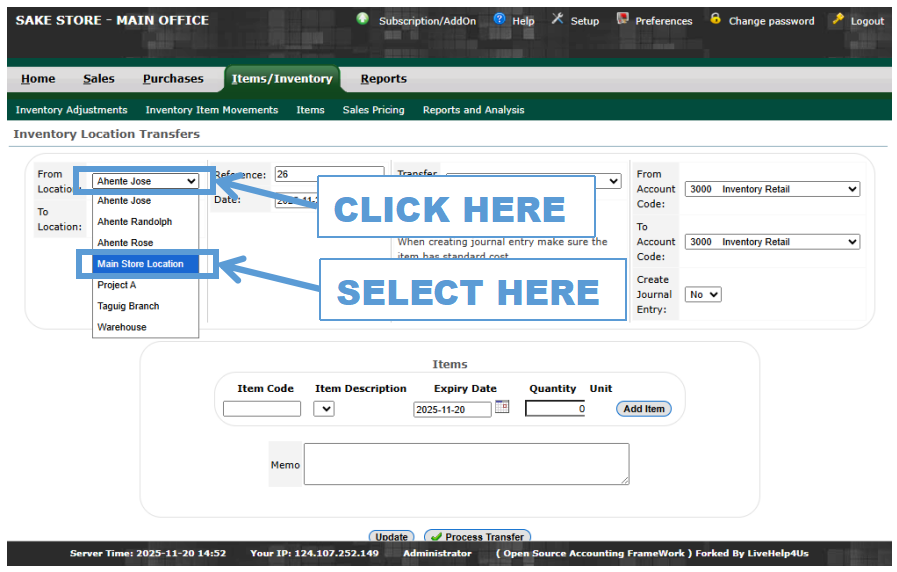 |
- STEP 5: Select To Location
- Select the destination location (e.g., Truck or Assigned Personnel).
 |
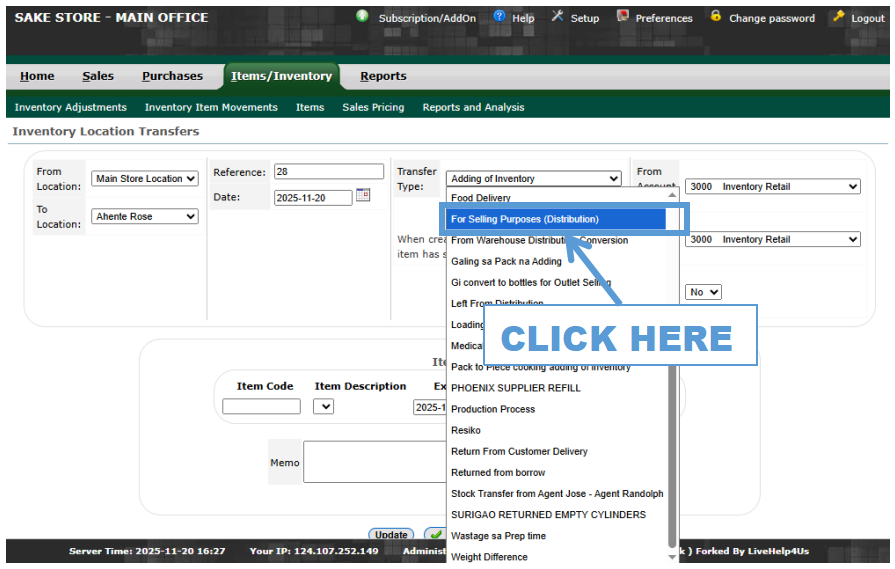
- STEP 6: Select Transfer Type
- Choose the transfer type (e.g., For Distribution).
 |
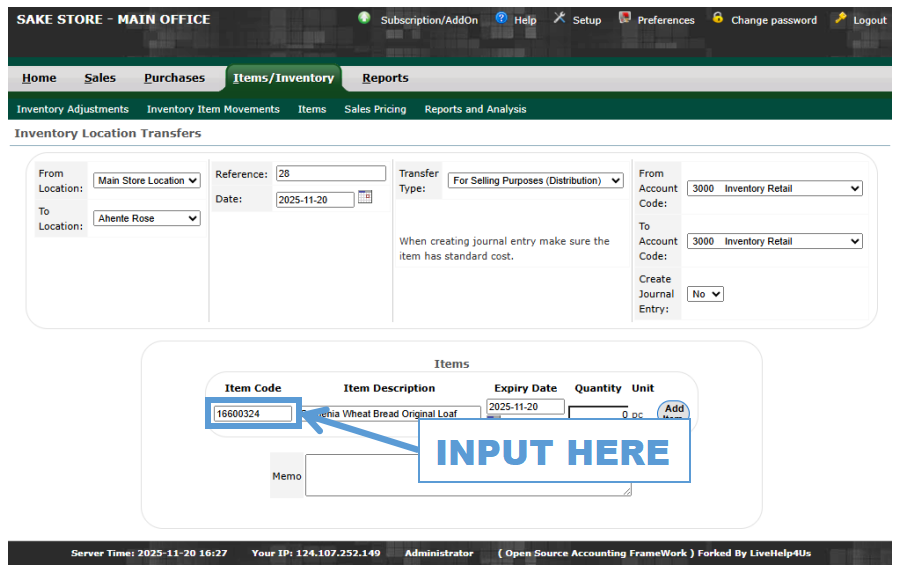
- STEP 7: Input Item Code
- Enter the item code of the product being transferred.
 |
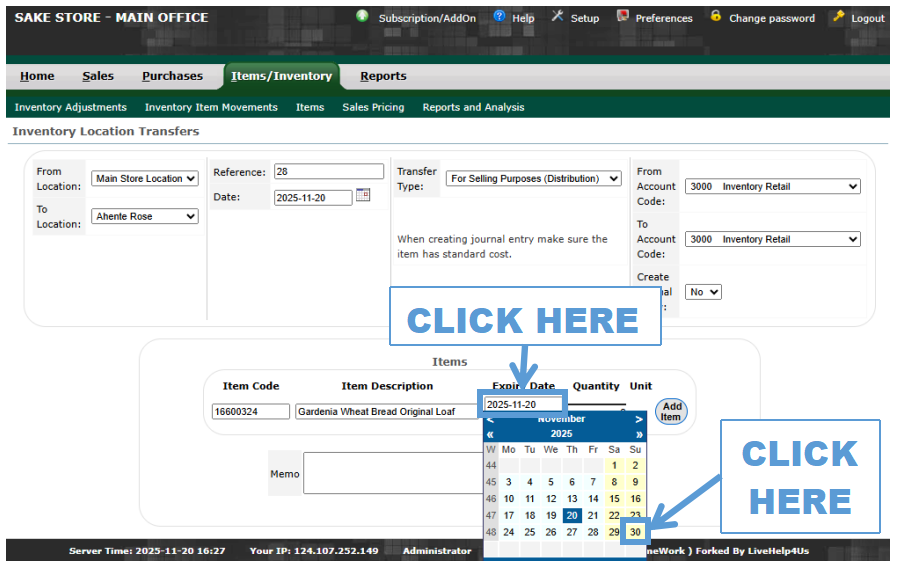
- STEP 8: Select Expiration Date
- Choose the appropriate expiration date for the stock being moved.
 |
- STEP 9: Enter Quantity
- Input the number of units to be transferred.
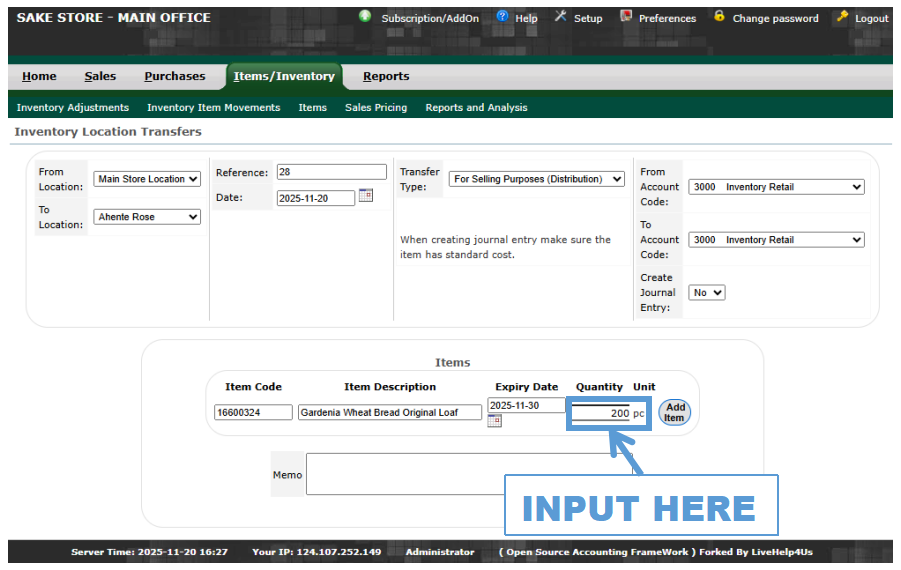 |
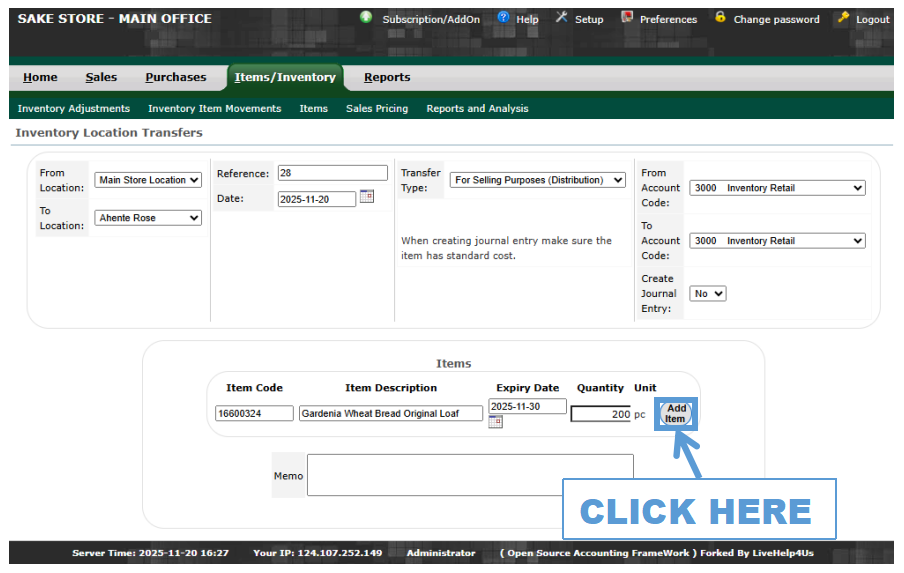
- STEP 10: Click Add Item
- Add the item to the transfer list.
 |
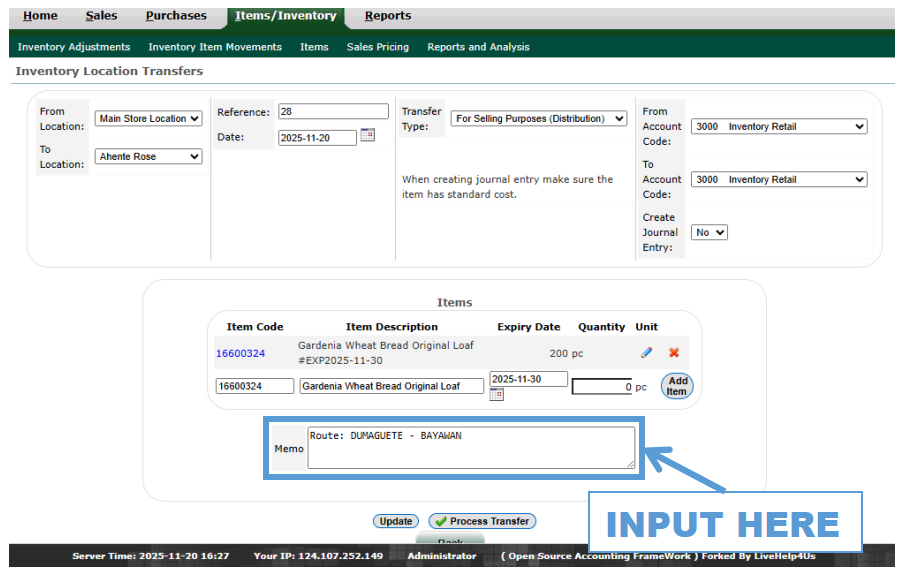
- STEP 11: Input Memo
- Enter a short memo or description for the transfer.
 |
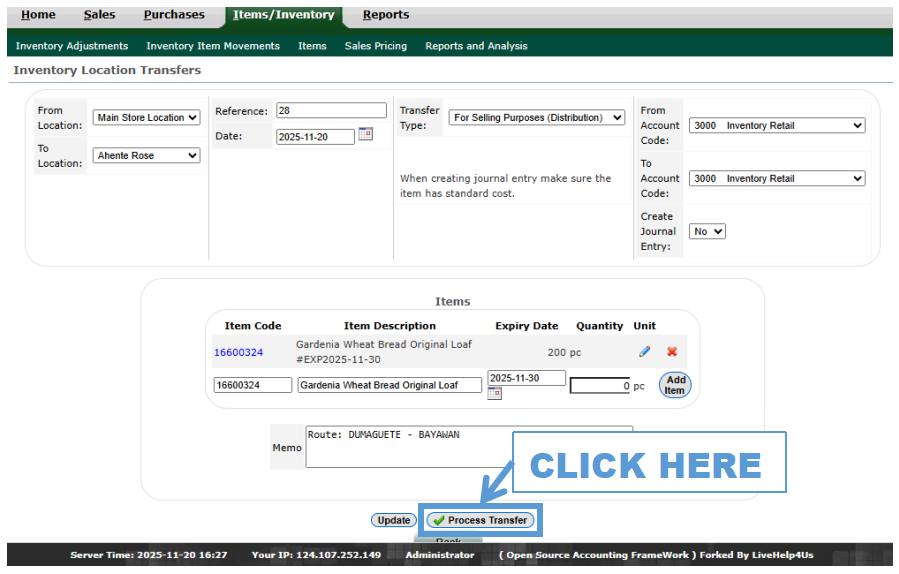
- STEP 12: Click Process Transfer
- Finalize and record the transfer by clicking Process Transfer.
 |
- STEP 13: Click View This Transfer
- After processing, click View This Transfer to check the details.
 |
- STEP 14: Here You Can See the Transfer
- The transfer details are now visible for review.
 |