Main /
Journal Entry
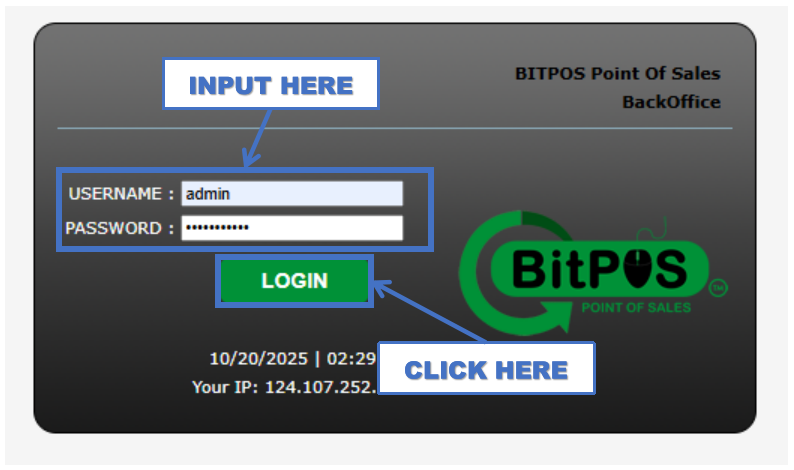
- STEP 1: Log in to the Back Office
- Access the Back Office using your admin credentials.
 |
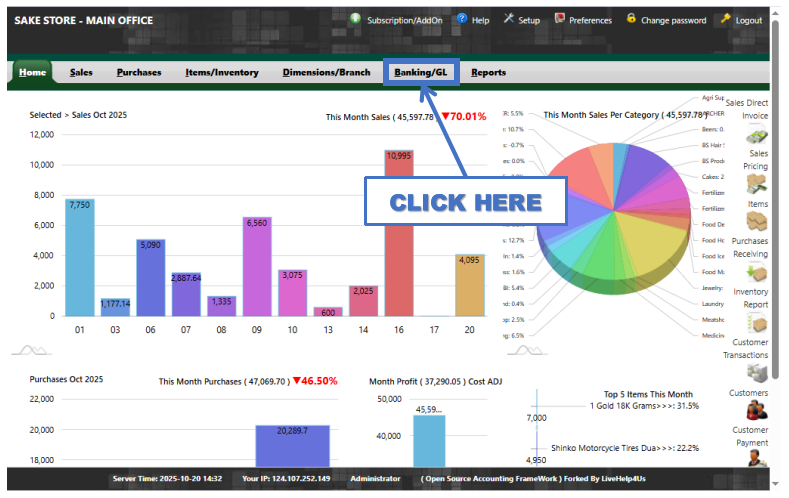
- STEP 2: Click Banking/GL
- From the main menu, select Banking/GL to open accounting options.
 |
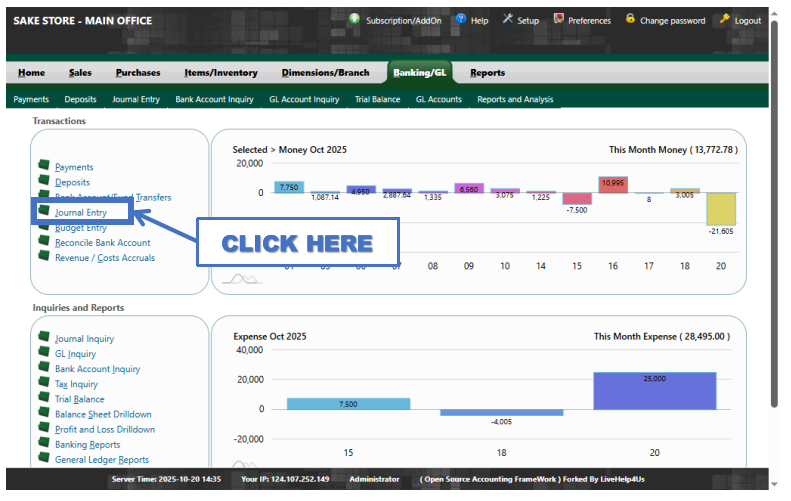
- STEP 3: Click Journal Entry
- Go to Journal Entry to create a new transaction record.
 |
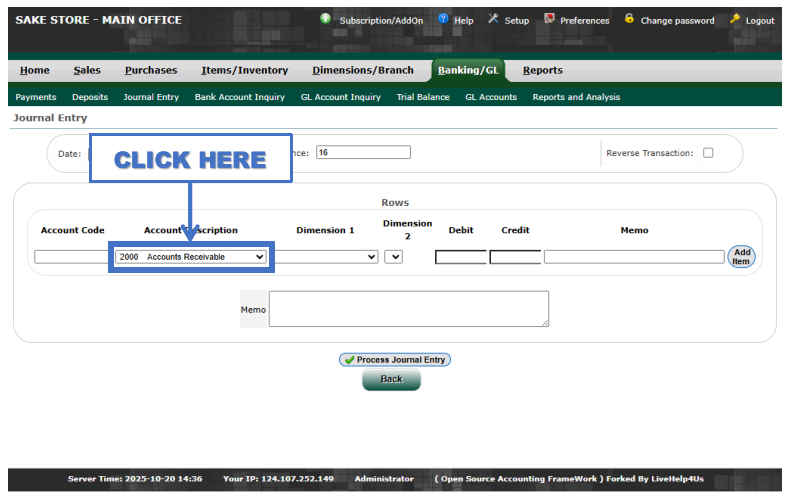
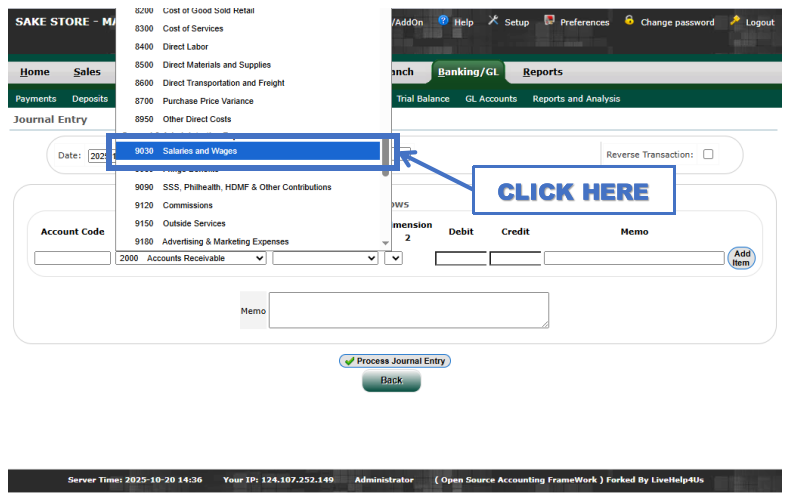
- STEP 4: Click on Account Description dropdown
- Under Account Description, open the dropdown list.
 |
- STEP 5: Select Expense Account
- Find and select the Salaries and Wages account from the Account Description list to record the expense.
 |
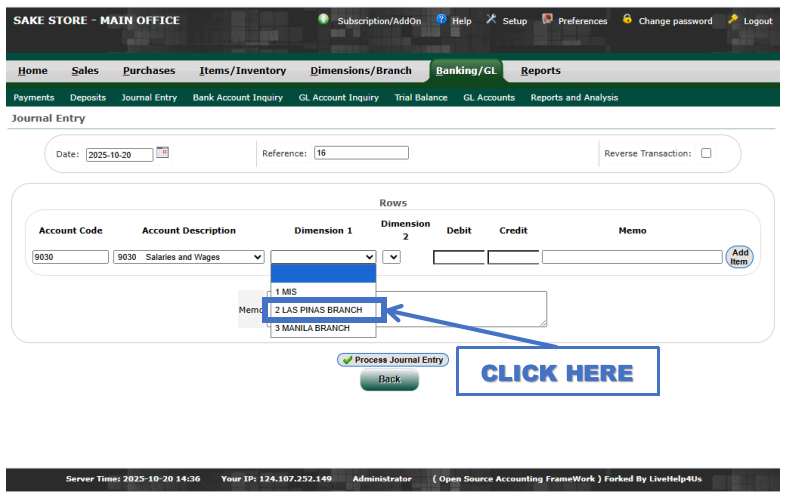
- STEP 6: Click Dimension 1 and Choose Branch
- Select the branch where the employee works (for example, Las Piñas Branch).
 |
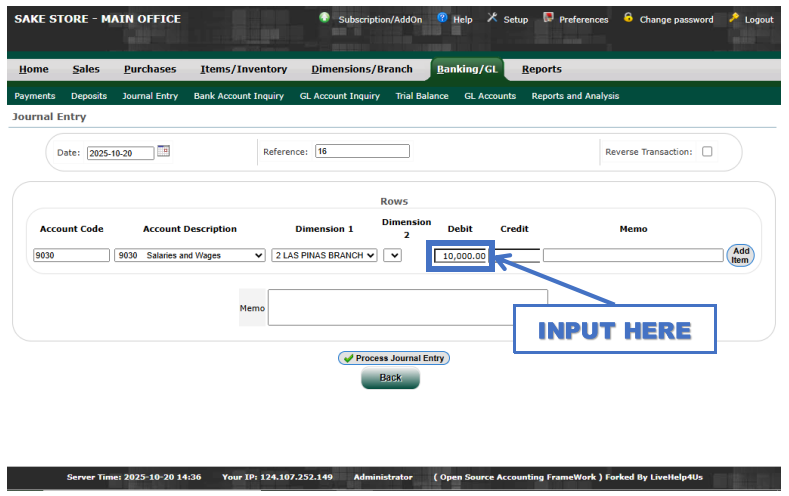
- STEP 7: Input Debit Amount
- Enter the total salary amount to be paid in the Debit column (for example, 10,000.00).
 |
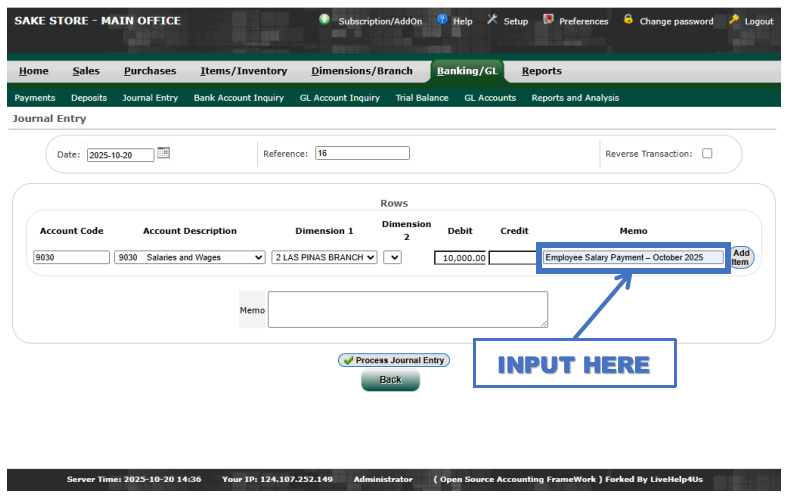
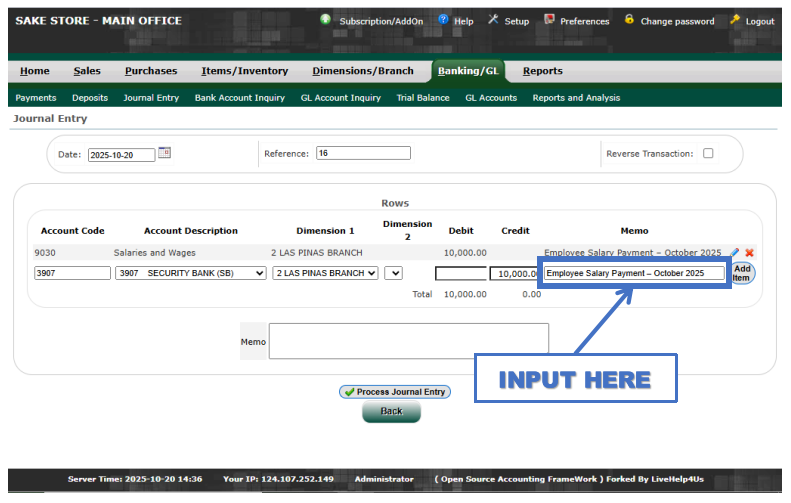
- STEP 8: Add Memo on the Right
- Add a note or description in the Memo field (for example, Employee Salary Payment – October 2025).
 |
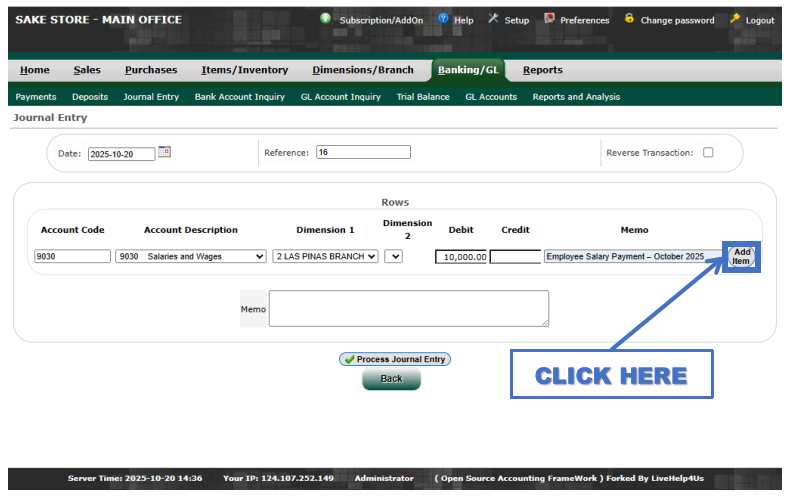
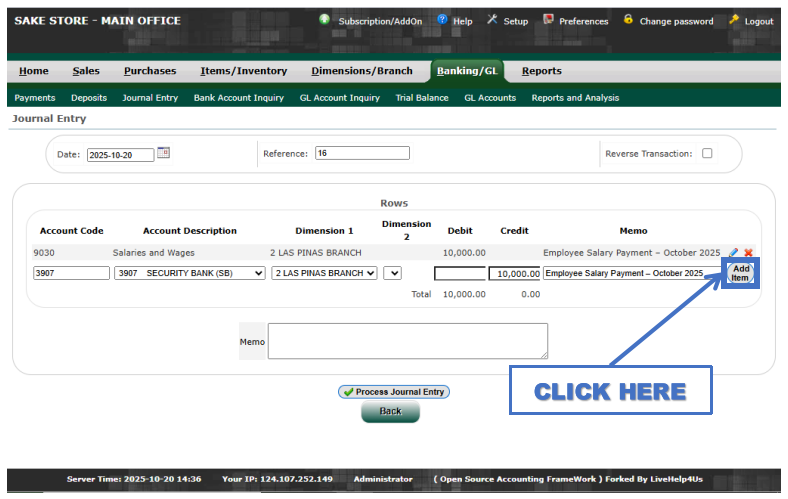
- STEP 9: Click Add Item
- After completing the debit entry, click Add Item to add the credit line.
 |
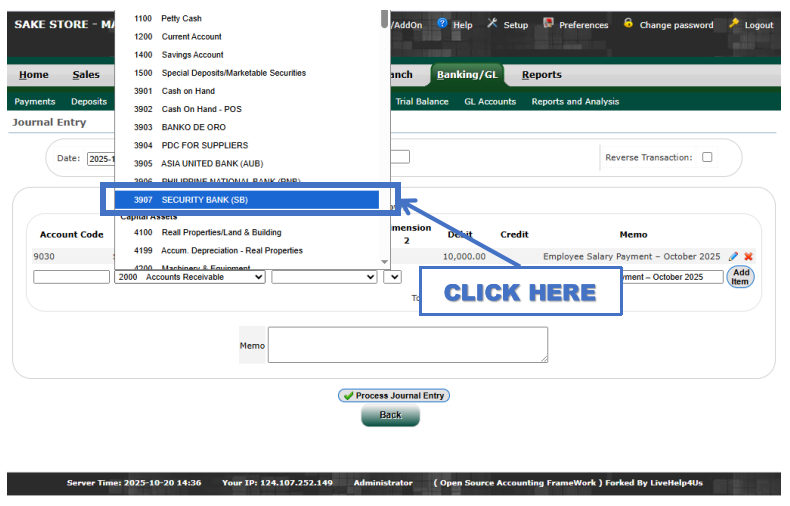
- STEP 10: Select Credit Account
- From the Account Description dropdown, select the payment account (for example, Security Bank) — where the salary amount will be deducted.
 |
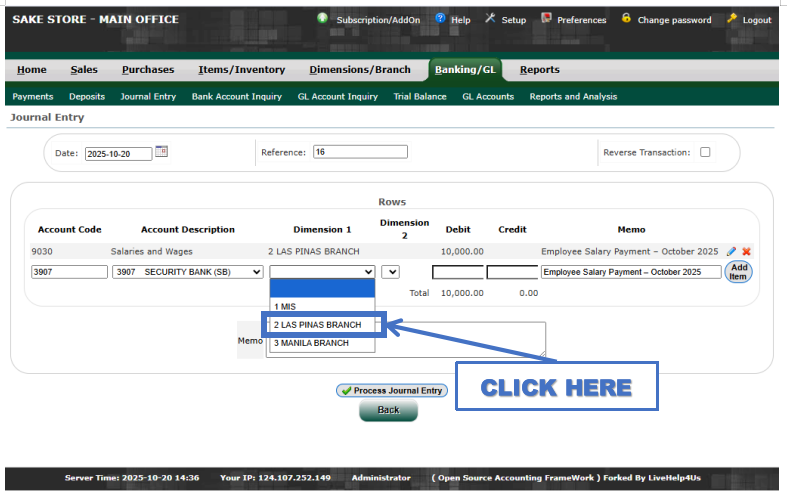
- STEP 11: Click Dimension 1 and Choose Branch
- Select the same branch as the debit entry (for example, Las Piñas Branch).
 |
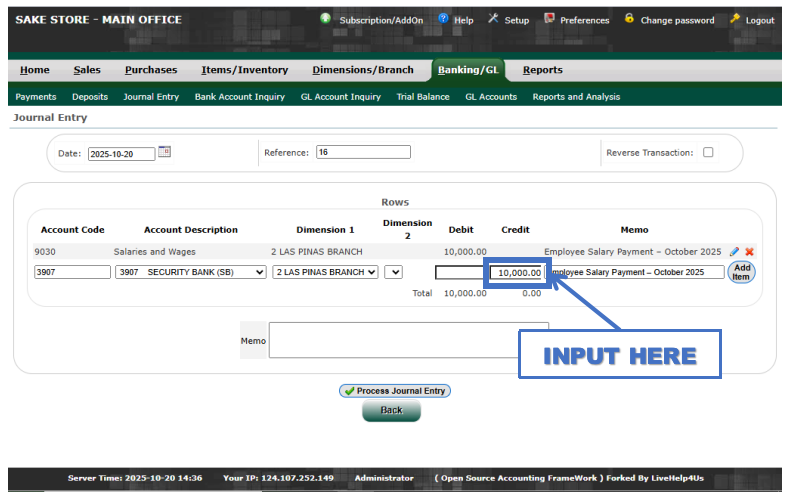
- STEP 12: Input Credit Amount
- Enter the same amount as the debit (for example, 10,000.00) in the Credit column.
- This represents the deduction from cash or bank for salary payment.
 |
- STEP 13: Add Memo on the Right
- Add a note or description in the Memo field (for example, Employee Salary Payment – October 2025).
 |
- STEP 14: Click Add Item
- Click Add Item to confirm the credit line entry and move to the next section.
 |
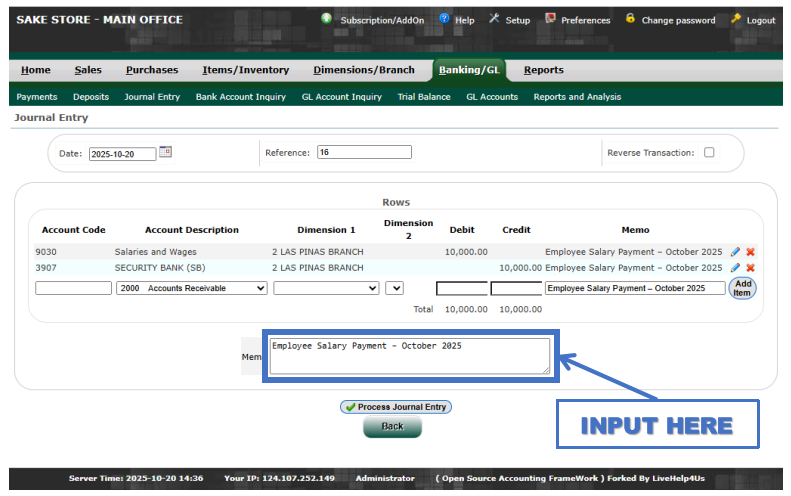
- STEP 15: Add Memo Below
- Add a note or description in the bottom Memo field (for example, Employee Salary Payment – October 2025).
 |
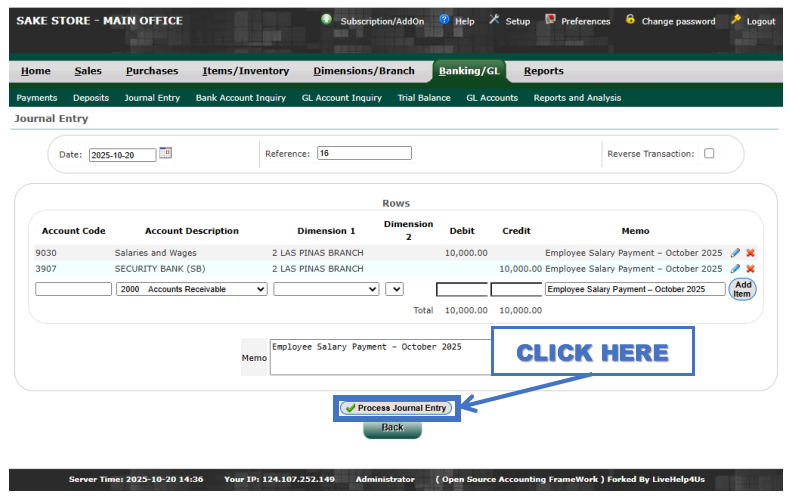
- STEP 16: Click Process Journal Entry
- Click Process Journal Entry to finalize and record the transaction.
 |
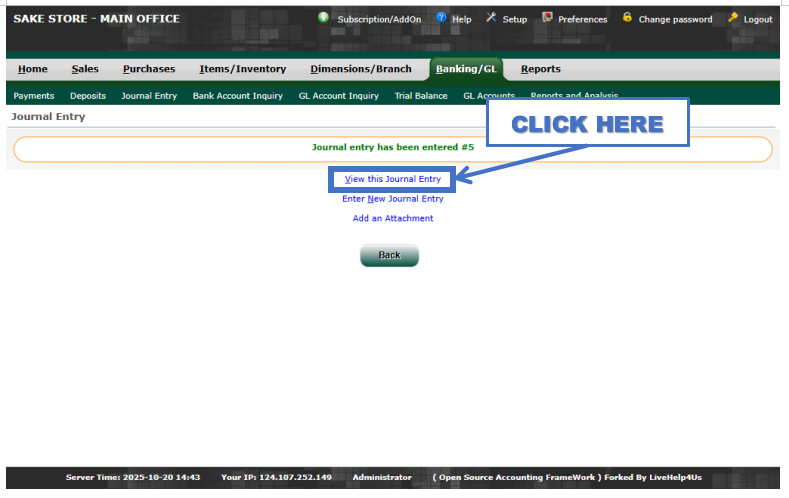
- STEP 17: Click View This Journal Entry
- Click the View This Journal Entry button to open the details of the processed transaction.
 |
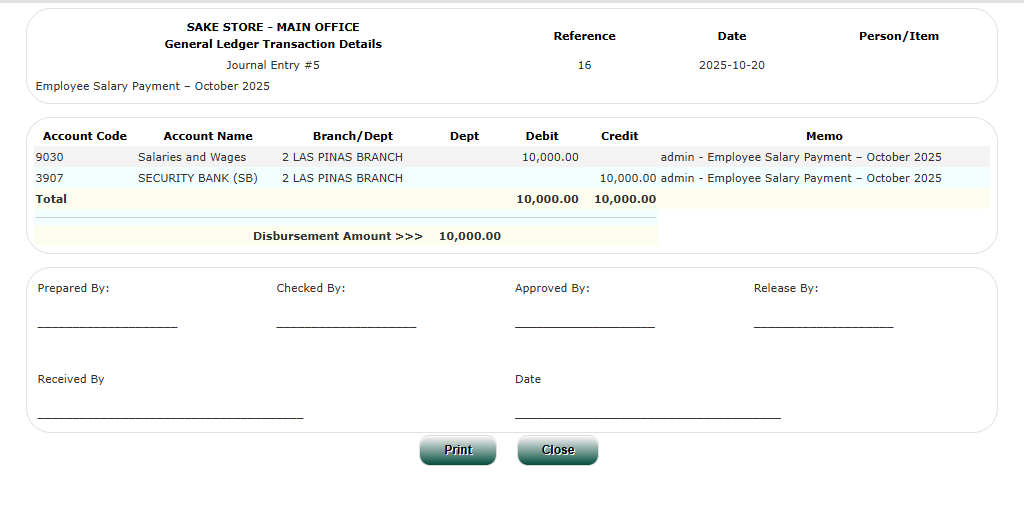
- STEP 18: Here You Can See the Journal Entry
- The system will display the complete journal entry, including the debit, credit, and memo details for verification.
 |