Main /
How to Record Expenses Using POS Cashiering Interface
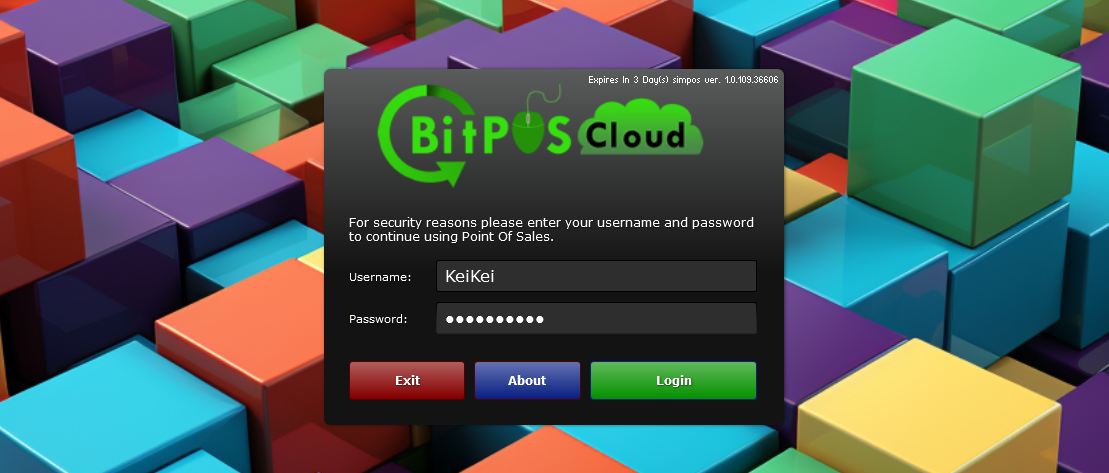
- STEP 1: Log in to the POS Cashiering
- Access the POS system using your credentials.
 |
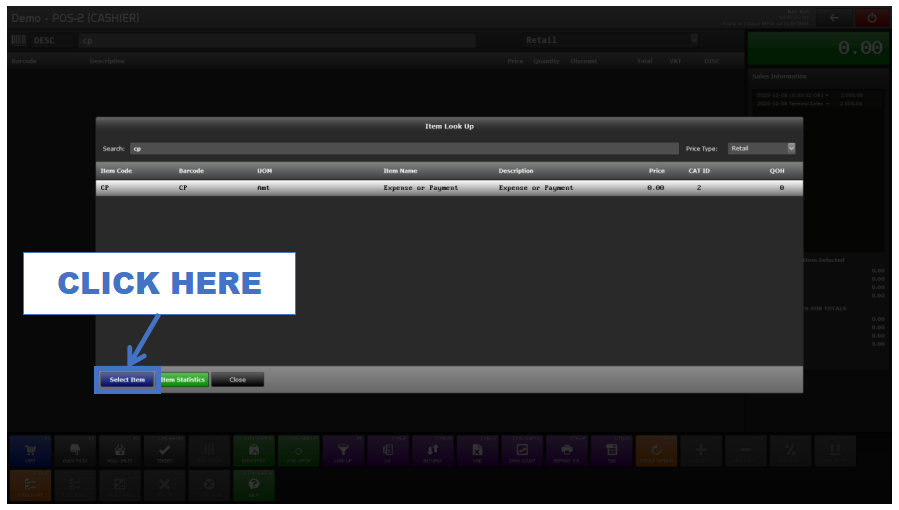
- STEP 2: Search CP
- Type CP in the item search bar.
 |
- STEP 3: Click Select Item
- Choose the CP item from the list.
 |
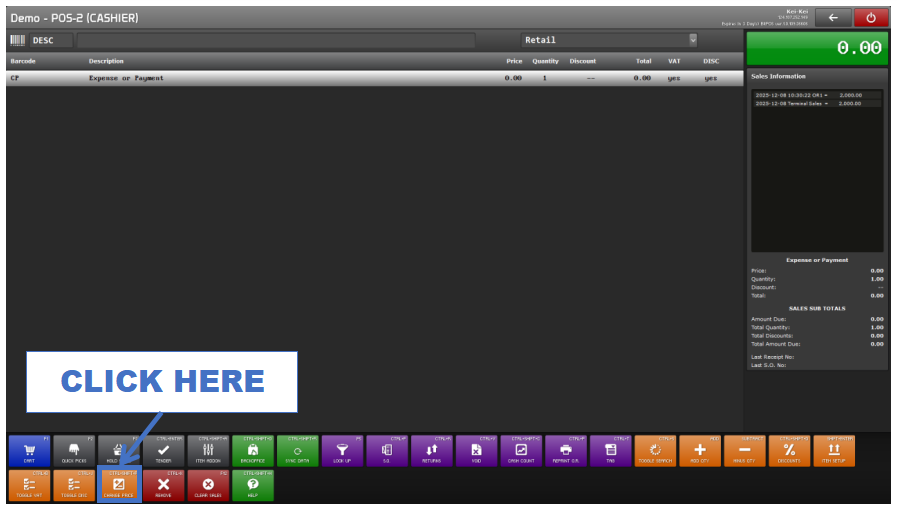
- STEP 4: Click Change Price
- Tap the Change Price button or press CTRL + SHIFT + P.
 |
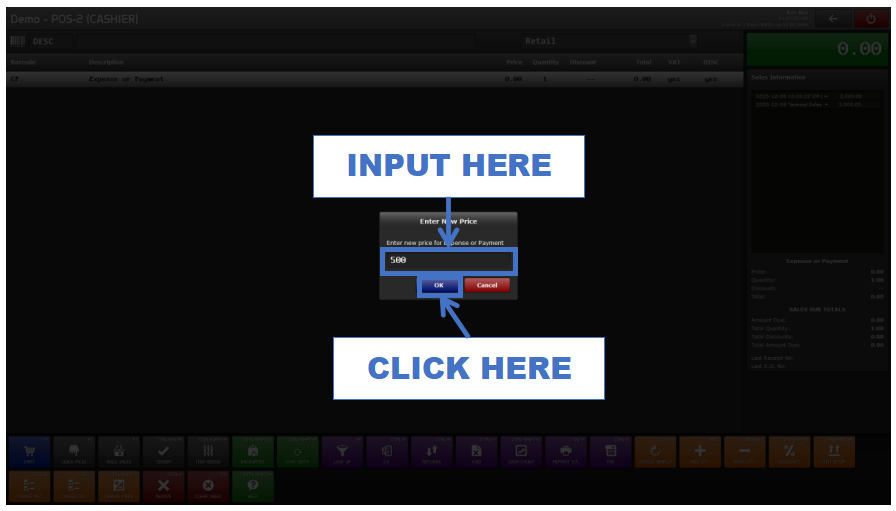
- STEP 5: Input the Expense Amount
- Enter the amount to record as an expense.
 |
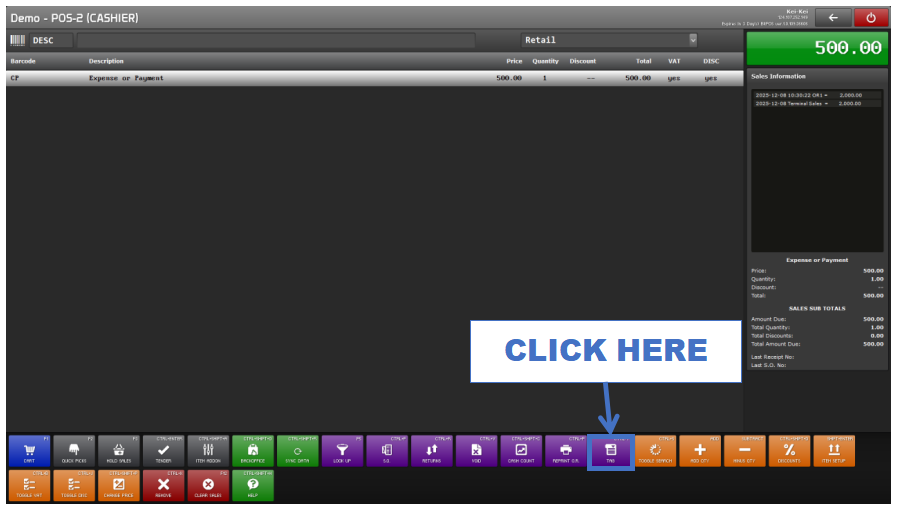
- STEP 6: Click Tag
- Proceed to tag the transaction.
 |
- STEP 7: Select Transaction Type (Expense)
- Choose Expense from the list.
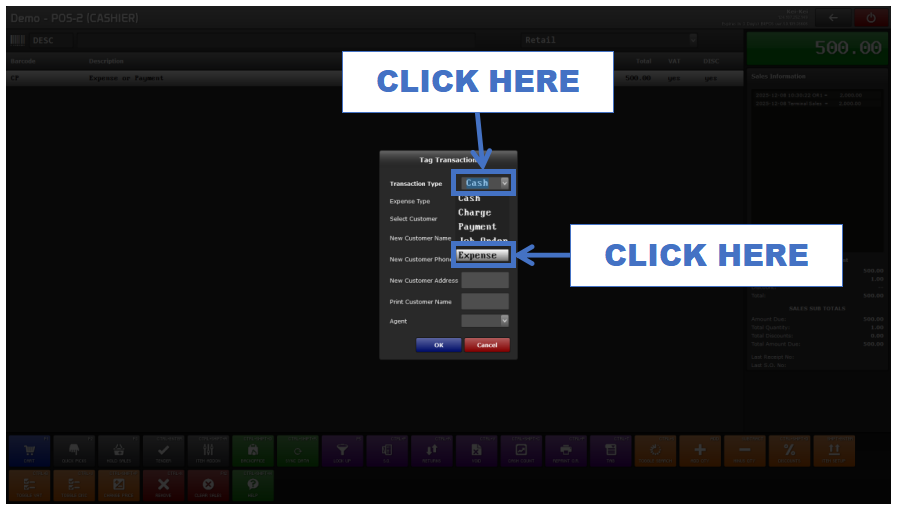 |
- STEP 8: Select Expense Type
- Choose the correct type (e.g., Fuel and Oil).
 |
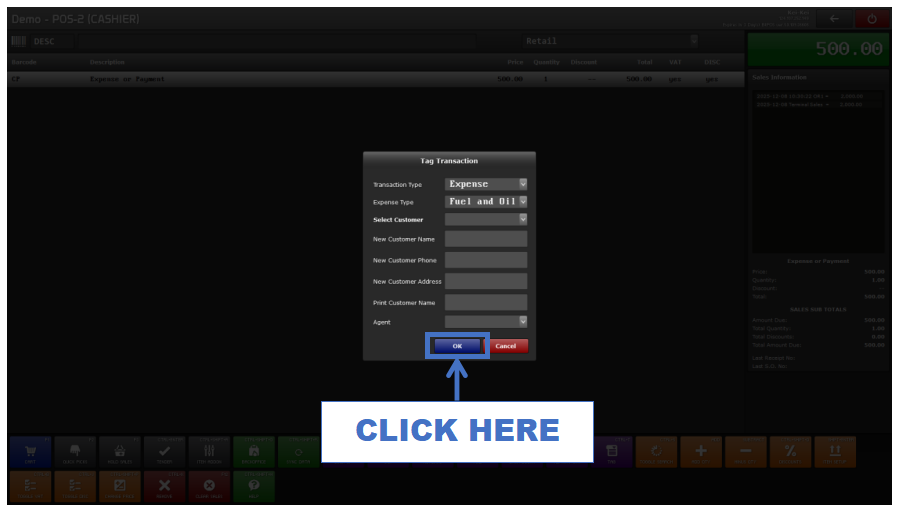
- STEP 9: Click OK
- Confirm the selected expense type.
 |
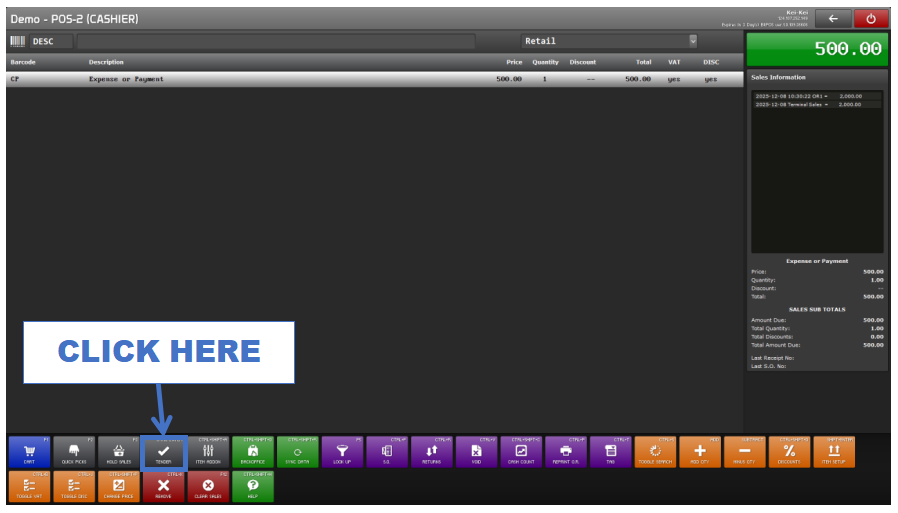
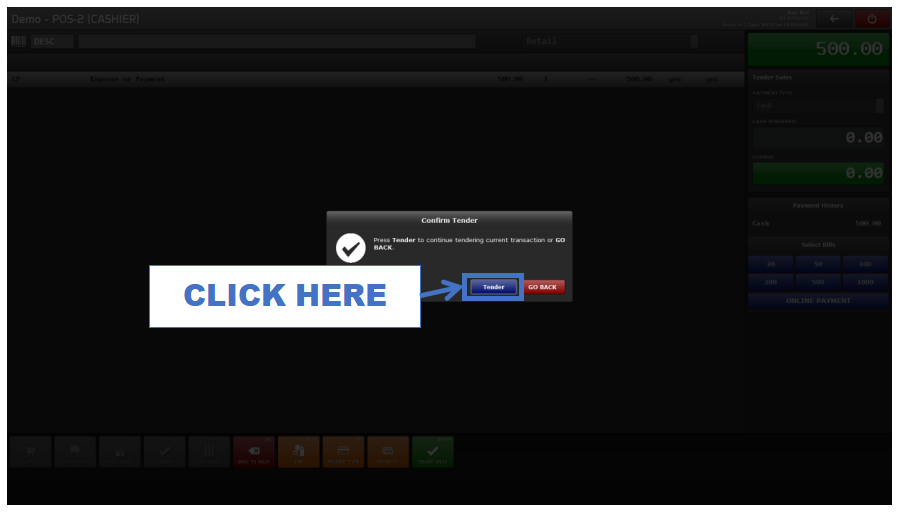
- STEP 10: Click Tender
- Move to the payment screen.
 |
- STEP 11: Input Exact Amount
- Enter the exact expense amount (e.g., 500).
 |
- STEP 12: Click Tender Sales
- Finalize and record the expense transaction.
 |
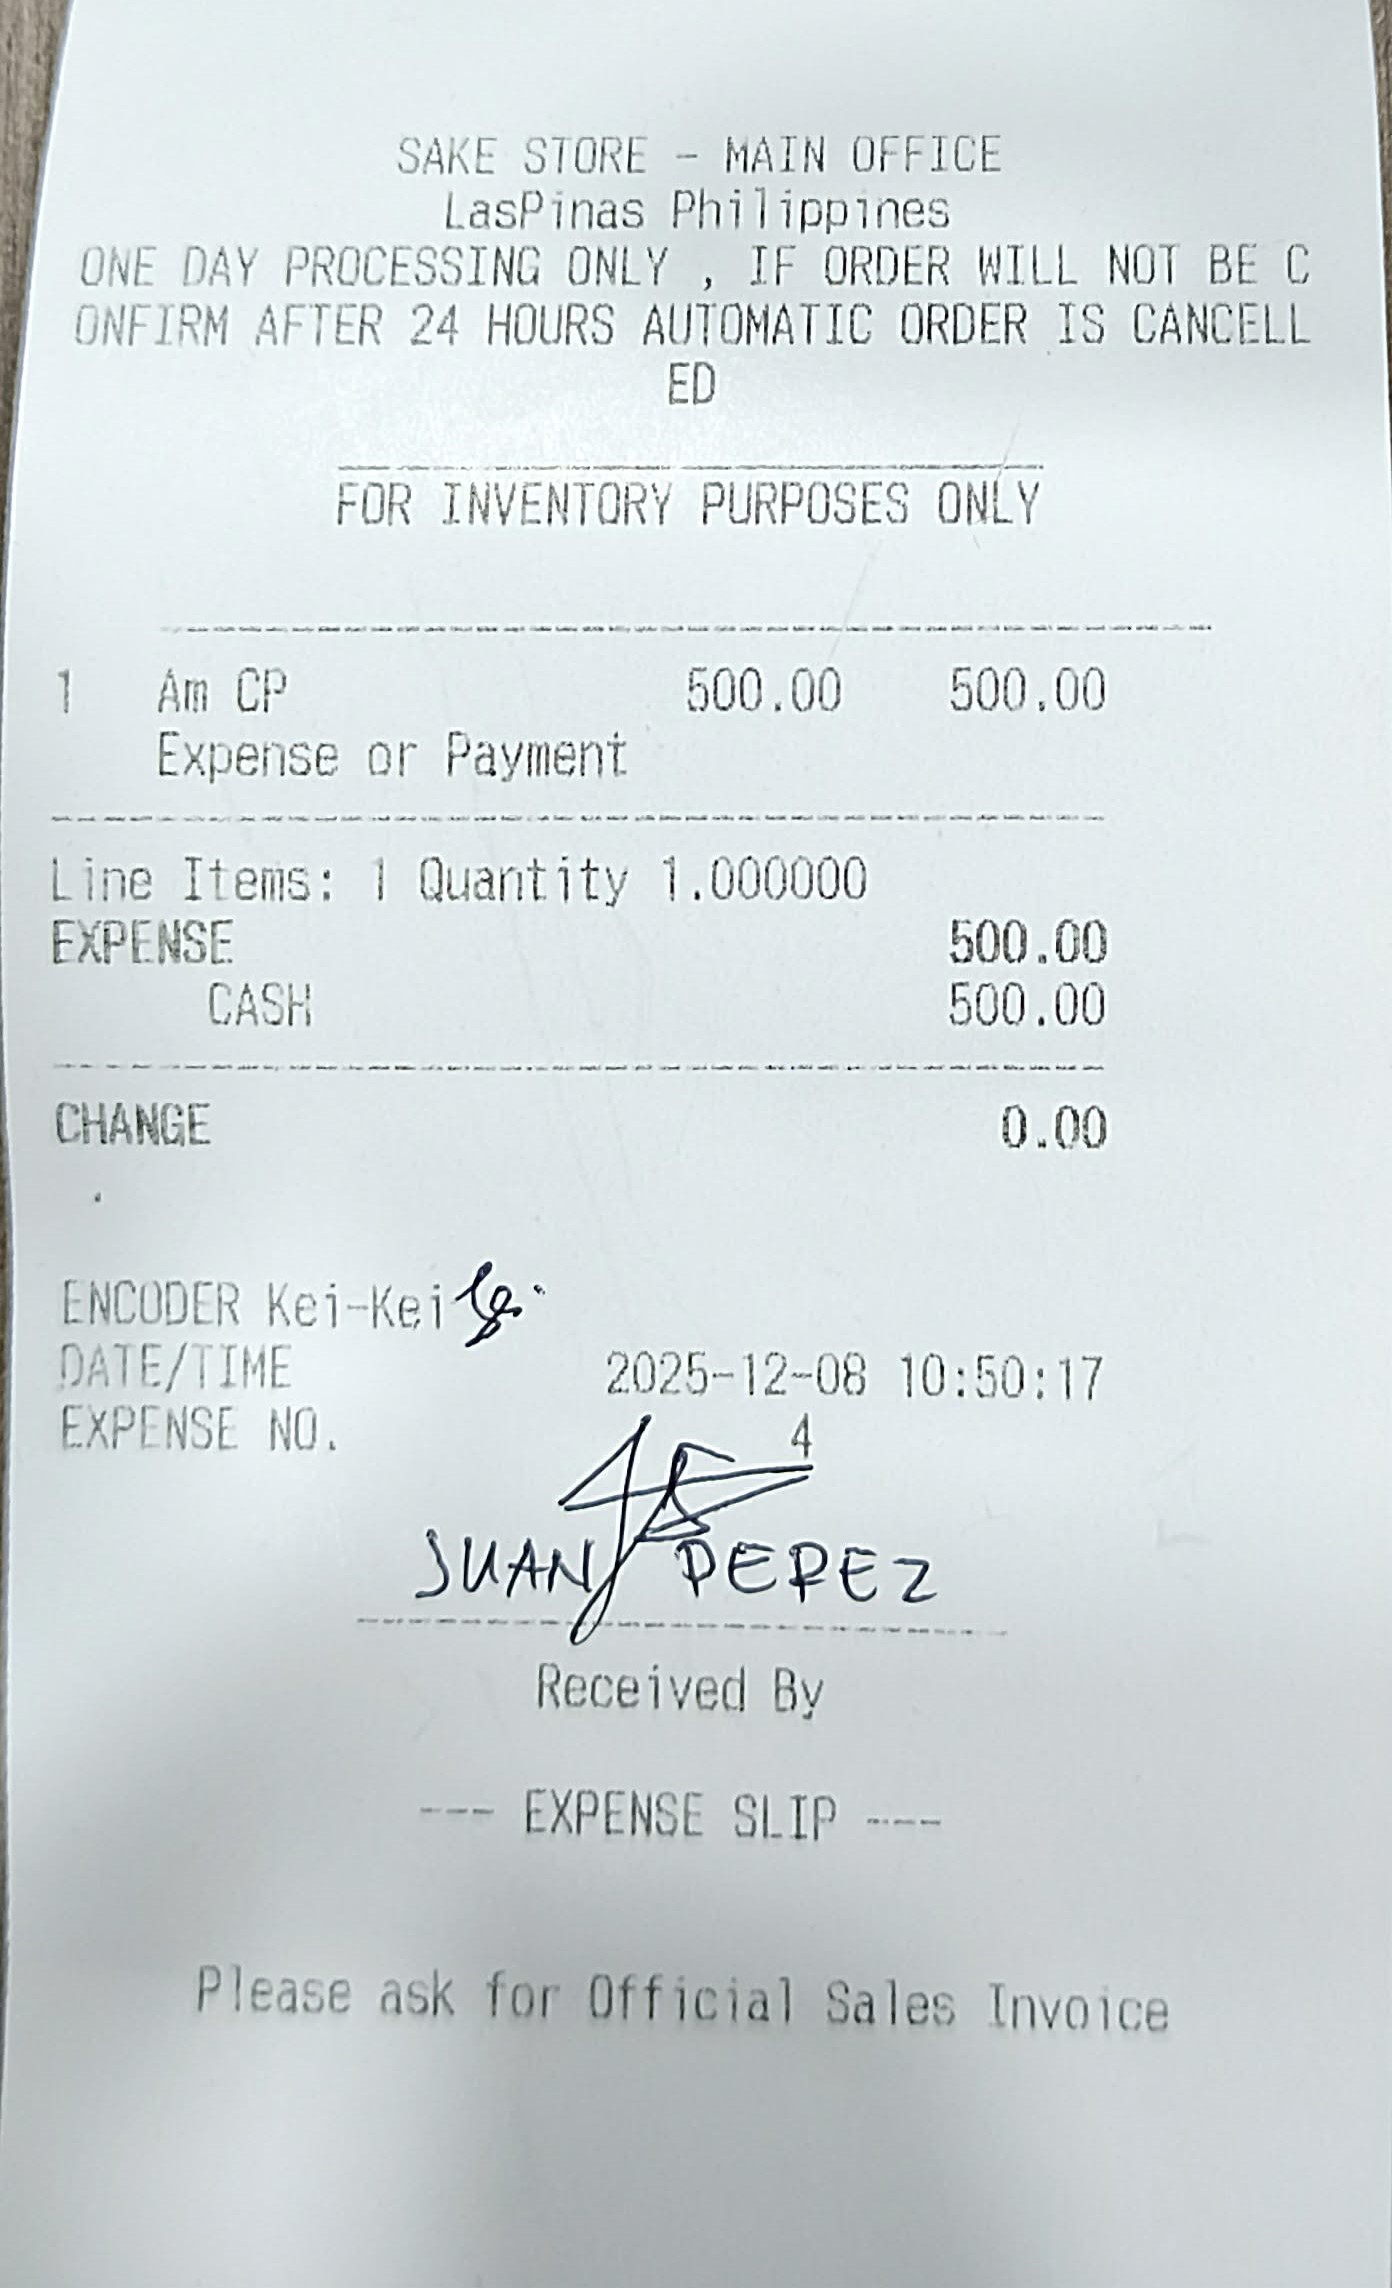
- STEP 13: Printed Receipt Appears
- A receipt will print—sign the required fields.
 |
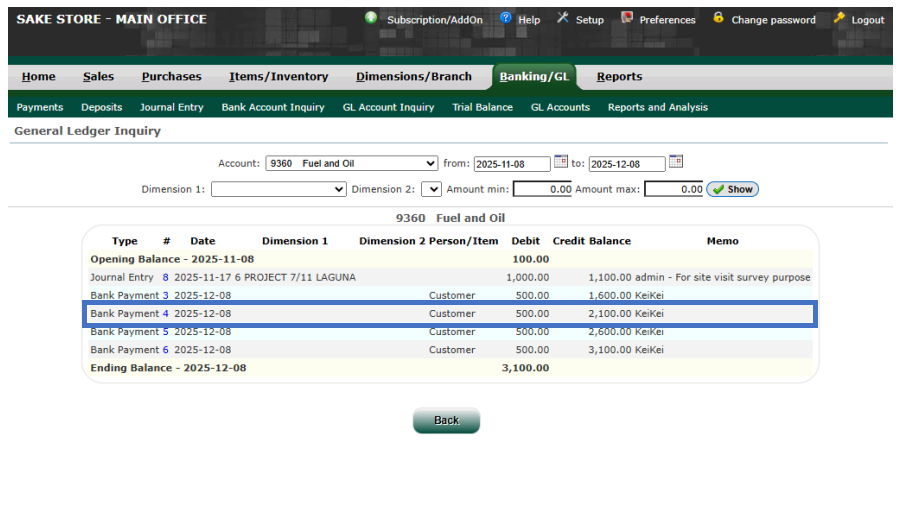
- STEP 14: Log In to the Back Office
- Go to Banking/GL and check the transaction details.
 |
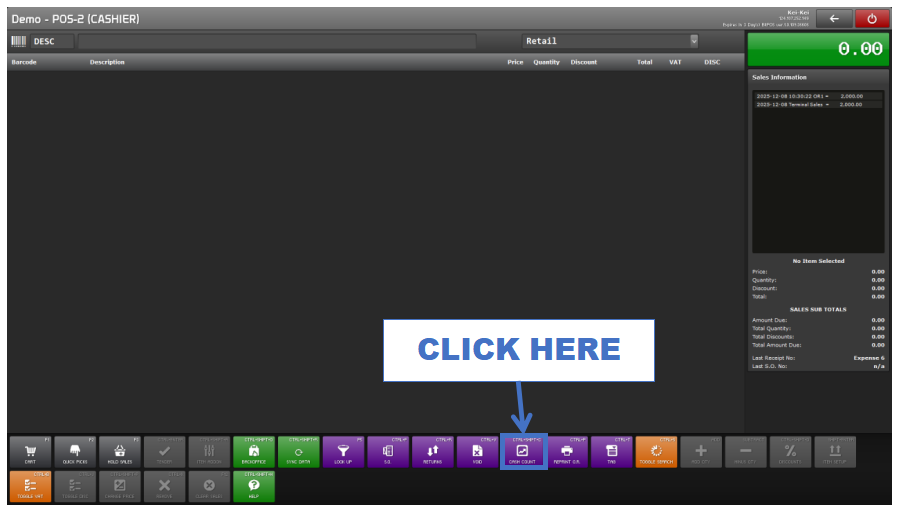
- STEP 15: Go Back to POS and Click Cash Count
- Start cash count process.
 |
- STEP 16: Input Necessary Cash Count Information
- Fill out cash deposit, cash pickup, and denomination details.
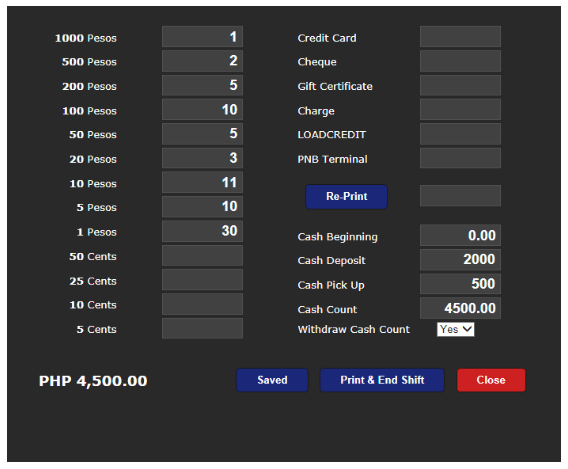 |
- STEP 17: Click Print and End Shift
- Finalize your shift for the day.
 |
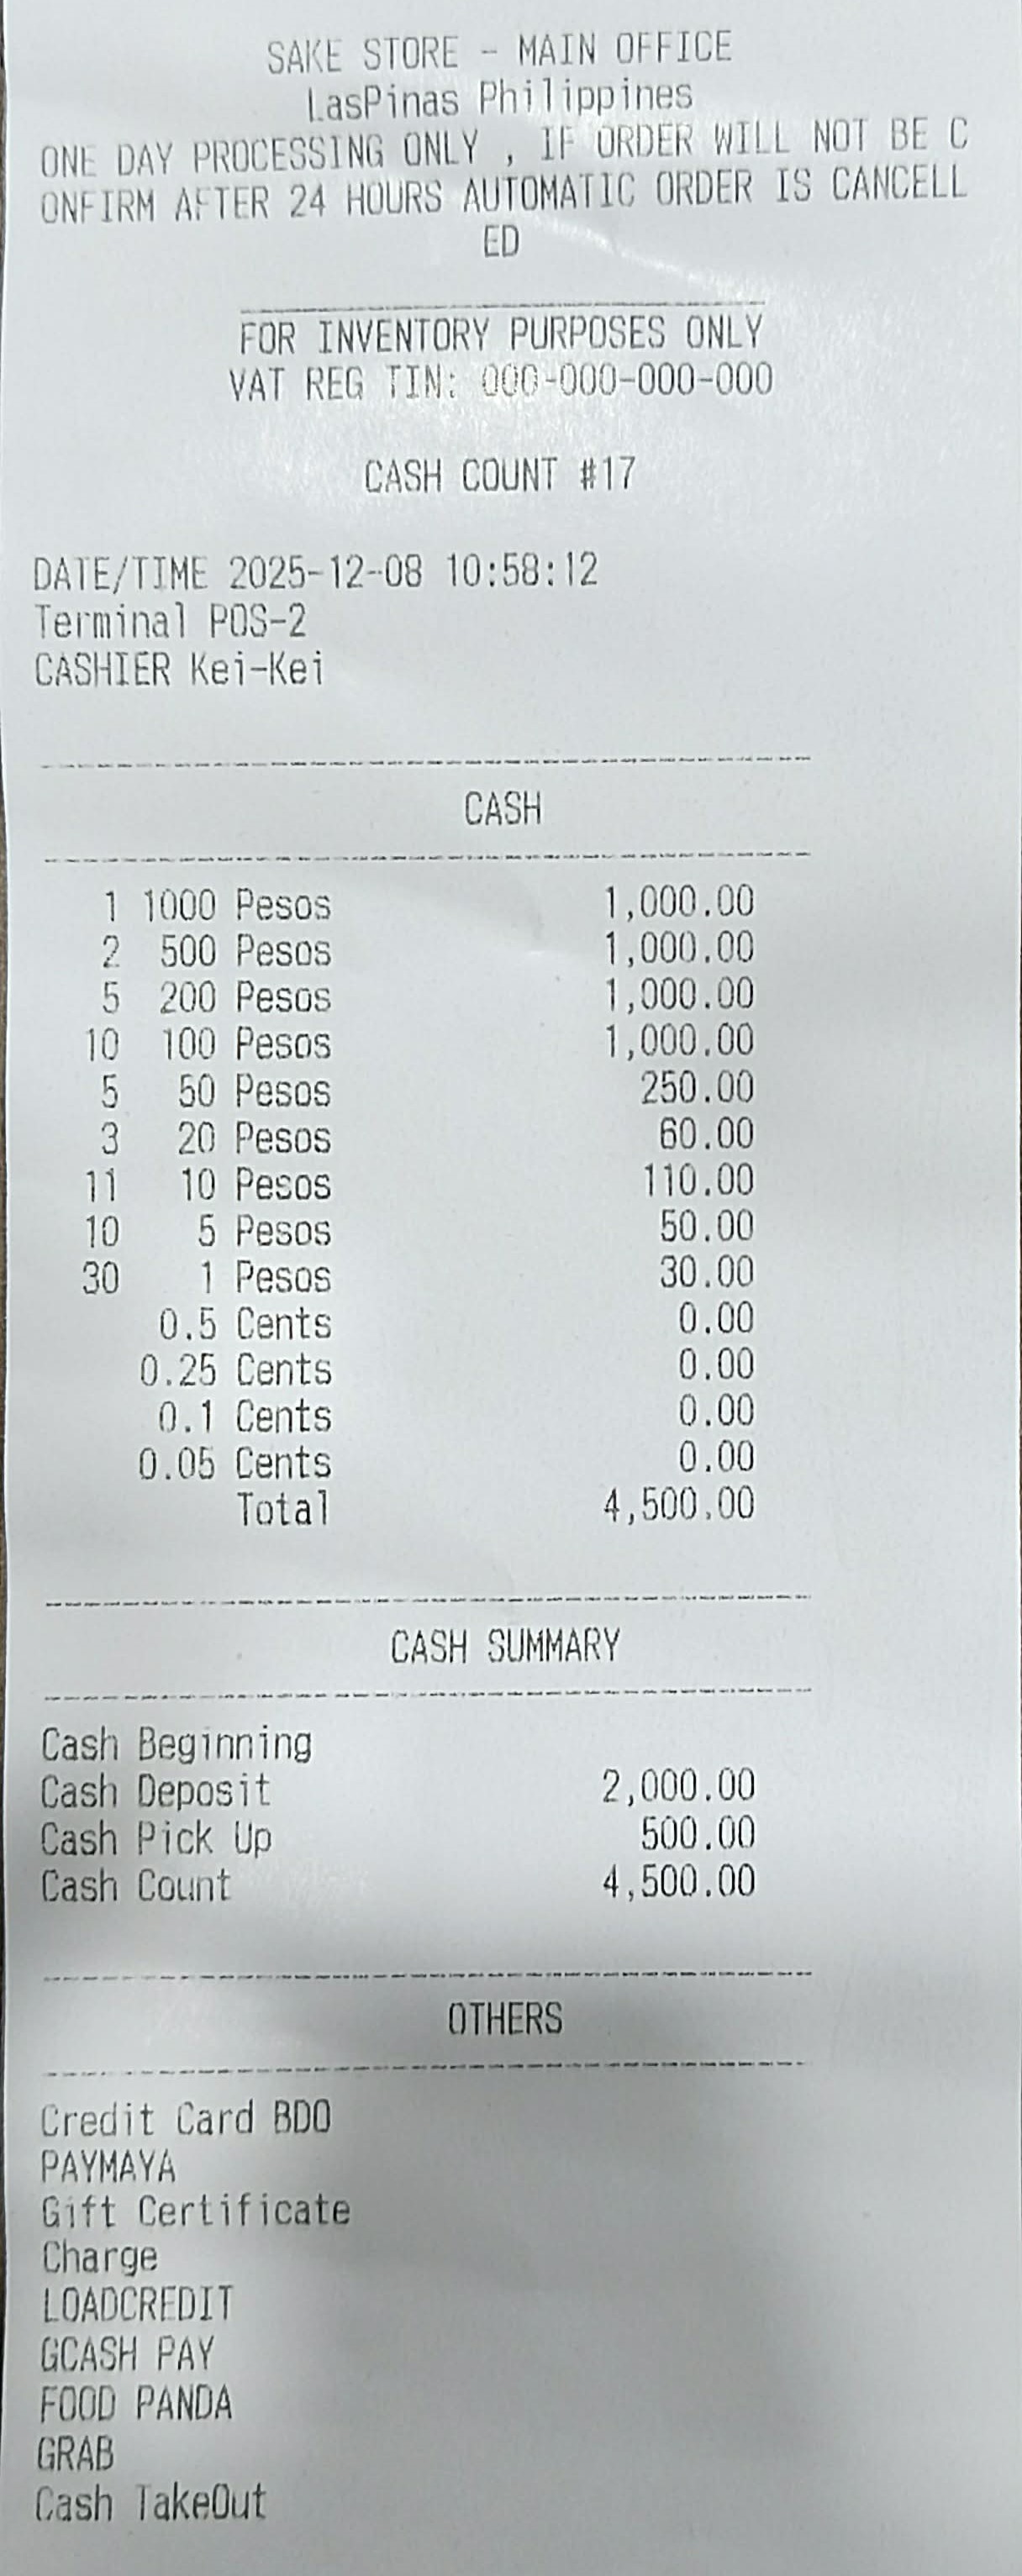
- STEP 18: Printed Cash Count Receipt Appears
- The system will print the cash count summary.
 |