Main /
 |
 |
 |
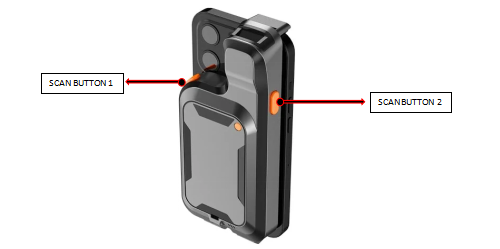
Barcode Scanner Features
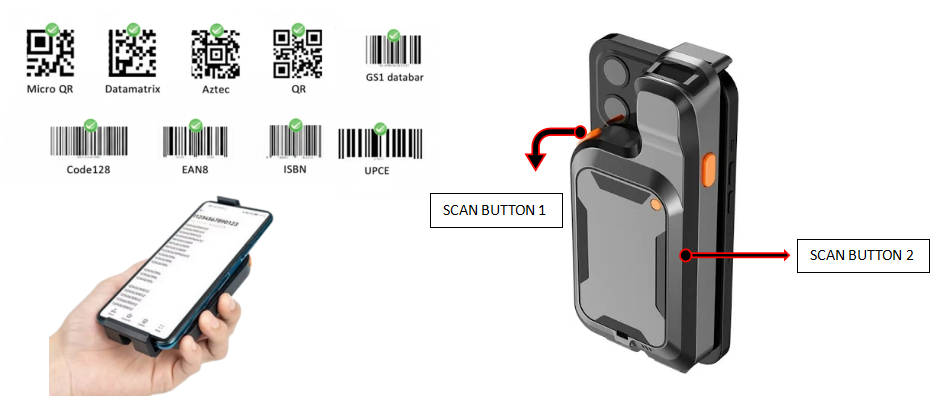
- Scan Button 1 and Scan Button 2:
     These are the primary buttons used to trigger the barcode scanning function. You press
     one of these to activate the scanner beam and read a barcode. Having two buttons
     makes it easy to scan regardless of how you grip the device.
- Scan Button (Power On/Off):
     A long press (usually 3–5 seconds) on Scan Button 1 or Scan Button 2 is a common way
     to power the device on or off.
- Scanning Window:
     This is the area where the laser or imaging light exits and enters to read the barcode.
     Keep this part clean to ensure accurate scanning.
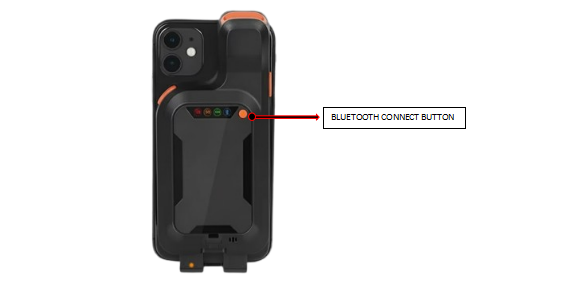
- Bluetooth Connect Button:
     Used to pair the scanner wirelessly with a host device
     such as a computer, tablet, or smartphone.
- Battery Level Display:
This indicator shows the remaining charge on the device’s battery.
- Charging Port:
The port where you plug in the power cable to recharge the device’s battery.
- Speaker Hole:
     This is where the audio feedback (such as a beep sound) comes from to confirm
     a successful scan or signal an error.
- Adjustment Lever:
     Used to adjust the grip or attachment mechanism to securely fit a smartphone
     or a separate device onto the scanner.
 |
- STEP 1: Attach and Power On the Scanner
- Attach your cell phone to the Clip-Back Scanner. Then, open the Clip-Back Scanner and press and hold Button 1 or Button 2 for 3–5 seconds to power on the device.
 |
- STEP 2: Turn On Bluetooth
- Press and hold the Bluetooth button for 3–5 seconds to activate the Bluetooth function of the device.
 |
- STEP 3: Pair the Scanner with Your Device
- Go to your phone’s Bluetooth settings and look for the Clip-Back Scanner device.
     1. Look for the device name BarCode Scanner HID.
     2. Click the device name BarCode Scanner HID.
     3. Then click the Pair button.
     4. Once paired, your device will be connected to the Clip-Back Scanner,
        and it will be ready for use.
 |
- STEP 4: Start Scanning
- Press Button 1 or Button 2 to scan a barcode and capture the data instantly.
 |